."
Showing posts with label chocolate. Show all posts

Sunday, April 1, 2012

Peanut Butter Oatmeal White Chocolate Cookies

I baked these cookies on a whim a couple of weekends ago.  I had a buttload of work to do, and was well aware of it.  What did I decide to do instead?  Go to yoga (Yes, I started doing yoga!  Though it's kicking my butt, I'm enjoying it immensely so far.), take a nap with Maeby, and then do a little procrasti-baking.  


procrastibaking9 up, 3 down
to procrastinate writing a paper (or other dreaded task) by baking
Instead of writing my dissertation, I was procrastibaking all weekend. Enjoy the muffins.

Thanks to urbandictionary.com for the definition.  


Perhaps not the best string of ideas, as far as productivity goes... but it yielded some tasty cookies!


This recipe comes from the blog Love Veggies and Yoga.


You'll need:


1 stick of butter
1/3 cup peanut butter
1 cup brown sugar
1/2 cup white granulated sugar
1 egg plus 1 yolk
2 tsp vanilla extract
1 1/4 cup all purpose flour
1 cup old fashioned oats
1/2 tsp baking soda
3/4 cup white chocolate chips
1/2 cup peanut butter chips (or butterscotch, chocolate, etc.)


Preheat your oven to 325 degrees F.


In a medium-sized, microwave safe bowl, melt the butter and peanut butter together.  Nuke it in 30 second intervals, stirring in between.  It should only take about 90 seconds or so.


Add the sugars to the melted butter and peanut butter mixture.  Stir together.  Place the bowl in the freezer for a few minutes, or if you have some time on your hands, allow this mixture to come to room temperature on its own.  The purpose behind doing this is to cool the mixture before adding eggs, thus preventing inadvertent scrambling.


Remove the mixture from the freezer and add the whole egg and egg yolk, and vanilla extract.  Stir together.


Add the flour, oats, baking soda, and stir to combine.  Add in the chocolate chips and peanut butter chips too, and stir to combine again.


Drop or roll ~1-inch balls of dough onto cookie sheets, approximately 2 inches apart.


Bake for 10-12 minutes.  Then enjoy!


Wednesday, February 29, 2012

S'mores Cookies

How have I not blogged about these yet?!?  Seriously.  These cookies are, in a word, amazeballs.


Sean and I visited Adrienne and Matt at their new place in Ohio, and it was requested that I bake up a little something.  As soon as I saw this recipe on The Girl Who Ate Everything, I knew we had a winner.

You'll need:
11 tbs unsalted butter, softened
1 cup brown sugar, packed
1/2 cup granulated sugar
2 large eggs
1 tsp vanilla
1 tsp baking soda
1/2 tsp salt
1 tsp cinnamon
2 1/2 cups flour
1/2 cup semi-sweet chocolate chips
1 cup mini marshmallows
3 regular-sized Hershey's chocolate bars, broken into pieces
1-2 sleeves of graham crackers, broken into squares

Preheat your oven to 375 degrees F.  Line two baking sheets with parchment paper.  

Lay out your graham crackers side by side, as close to one another as possible.  Ideally, they should be touching one another.  Definitely not overlapping, though.  Depending upon the size of your baking sheets and the amount of dough you have/how thick or thin you'd like your cookies to be (if you want thicker, use more dough, if you want thinner then use less dough per graham cracker), you might need to do this on more than 2 cookie sheets.

In a bowl, mix together the flour, baking soda, salt and cinnamon to combine.  Set this aside.

In another bowl, or the bowl of a stand mixer, cream the butter and sugar together until it's light and fluffy.  Add the eggs and vanilla, mix well until combined.

Little by little, add the flour mixture to the egg mixture.  Stir to combine, on low speed.

Fold in the marshmallows and chocolate chips.  You can chill the dough for 1 hour-overnight, if you desire.  I didn't chill mine, and they were phenomenal anyway.

Place tablespoons of the dough on top of the graham cracker squares, about 1 to 1 1/2 inches apart.  Press down on the tops slightly with your fingertips.  

Bake for 5 minutes, then remove from the oven and press Hershey's bar pieces into the dough.  I only had enough chocolate for 1 square per blob of dough.  But feel free to add more if you have it.  

Bake for an additional 5-7 minutes, or until the dough is beginning to turn golden brown at the edges.  Remove to a wire rack to cool.


Try to not eat most of them immediately.  Seriously, these were... amazeballs.  Like I said.  Don't believe me?  Consult anyone who was there that weekend.  They will tell you.  

These cookies tasted just like a s'more that you would create around the campfire.  Even though I'm not a huge fan of Hershey's chocolate in general, I'm of the opinion that you need to use Hershey's for these cookies.  Otherwise it just wouldn't taste like the s'mores of your childhood.  Unless you have some fancy pants family that used Godiva or something around the campfire.   

Anyway, we had a fantastic weekend (that went by too quickly) and these cookies were enjoyed immensely by everyone.  See the photos below for a snapshot into our weekend, and please enjoy the cookies!!

Playing dominoes.

Out to dinner the first night.  Ignore how grody I look.  I was in the car for like 6 and a half hours that day.

Irish car bombs!

Wednesday, February 1, 2012

Hot Chocolate-Chocolate Chip Cookies

So, following the new year, I've been trying to clean up my act.  You know, generally eat better.  Stop scarfing down baked goods like it's my job.  I'm still stuck in a post-holiday food rut.  But still, I'm trying to do better.  Some of the posts might not necessarily reflect that... and frankly neither will this one, hahah.  I was sick for about a week in January, and craving baked goods.  So... yeah.  I caved.  Oh well, sorry guys!  I promise there will be more healthy recipes in the future!


I found the recipe for these cookies on the blog Beantown Baker.  I got about 5 dozen cookies out of this recipe.


You'll need:


3 1/4 cups flour
4 oz. hot chocolate mix (not sugar free)
1 tsp Kosher salt (or 1/2 tsp table salt)
1 1/4 tsp baking soda
2 sticks butter, room temperature
1 cup sugar
2/3 cups brown sugar
2 eggs
1 tsp vanilla
1 cup semi-sweet chocolate chips
1 cup white chocolate chips


Preheat the oven to 350 degrees F.  While the oven is preheating, in a medium bowl, mix together the flour, hot chocolate mix, salt, and baking soda.  Set this aside.


In another bowl (the one in your stand mixer, perhaps?), cream together the butter and sugars until they're light and fluffy. 


Add the eggs and vanilla to the butter/sugar mixture.  Mix until combined.  
  
Add the dry ingredients into the wet, just a bit at a time, until everything is incorporated.


Fold in the chocolate chips.


Beantown Baker recommends that you chill the dough for 1 hour.  I'm sure that doing that would allow the flavors to meld together, resulting in an even more delicious cookie.  I was hasty, and baked them straight away, and they were still really good.


Line two baking sheets with parchment paper, and drop dough by the rounded teaspoon, approximately 2 inches apart.


Bake for about 10 minutes.  Allow them to cool slightly on the cookie sheet before removing them to a rack to finish cooling.

Sorry that the last one came out all yellowish.  Not sure what happened there.  Regardless, these cookies are really good!  They are sure to satisfy any chocolate or carb craving that you might have.  Enjoy!  

Sunday, January 8, 2012

Chocolate Ice Cream

One of my favorite gifts that I received this Christmas was my KitchenAid ice cream maker attachment.  I was all psyched up to use it as soon as we got back to Baltimore, and I tried.  I really tried.  I let the bowl freeze for 24 hours, made a delicious chocolate ice cream custard base, let it cool for 3 hours, and then proceeded to churn the ice cream in the attachment.  


... however ...


I managed to attach one piece incorrectly, and it gummed up the works.  I tried to stop the process, attach it correctly, and start again.  However, once you start churning, and the ice cream base is in the attachment, there's really no turning back.  It starts to freeze almost immediately, and you can't stop the mixer because the frozen stuff keeps it from being able to turn once you start it up again.


So I was left with a mostly soupy chocolate mess with quite a bit frozen solid to the bottom of the attachment's bowl.  


*womp womp*


Oh well, you live and learn!  So when Sean started asking if I was going to make a second attempt, I knew I had to try again.  So here's my second attempt at making some homemade chocolate ice cream.


Thank you My Kitchen Addiction for this recipe.


You'll need:


2 cups milk
1 1/2 cups heavy cream
1/4 cup cocoa powder
4 egg yolks
3/4 cups granulated sugar
1 cup semi-sweet chocolate chips (alternately, use milk or dark chocolate chips)


Combine the milk and heavy cream in a saucepan over medium-low heat.  Do not allow it to boil.  Sift in the cocoa powder and add the chocolate chips.  Stir to combine.


While the chocolate is melting, beat together the egg yolks and sugar in another bowl until the mixture is very light in color and falls back back from the beaters in ribbons into the bowl.  


Once the chocolate is melted, scoop out about 1 cup of the cream mixture and gradually beat it into the eggs and sugar.  This will temper the eggs and keep them from scrambling,


Pour the tempered egg mixture into the cream and chocolate and continue to cook over medium-low heat, stirring constantly, until the mixture is thick enough to coat the back of a wooden spoon. 


Once the custard has thickened, transfer it to a clean mixing bowl and allow it to cool for about 30 minutes.  Cover with plastic wrap, making sure that the plastic touches the surface of the custard.  Refrigerate until well-chilled, or at least 2 hours.  


Then, freeze in your ice cream maker!  Please follow the manufacturer's directions, unlikeI did the first time around.  When it comes out of the ice cream maker, it will be soft serve consistency.  You can eat it as is, or freeze it for a few more hours until it reaches a hard ice cream consistency.


Sean was my official taste tester for this recipe.  The verdict?  He approves!  I had a small bite (stupid diet...), and it is really good.  It's creamy, decadent, and super chocolately.  I highly suggest that you try it out.  You can also make your ice cream a little more exciting, if you're so inclined, by adding some toasted nuts, chopped chocolate, sprinkles, or whatever to the ice cream maker during the last few minutes of churn time.  Enjoy!!


Also!  Please take note of the fancy new buttons that my brother put on my blog above the "about me" section.  Now it's easy for you to "like" this blog's page on Facebook, follow on Twitter, and follow me on Pinterest.  Please "like" and follow this blog! =)

Friday, December 30, 2011

Peanut Chocolate Chip Pretzel Oatmeal Cookies

When Sean was out of town for the weekend a few weeks ago, I decided to go on a baking rampage.  I made these cookies, some more Oreo Chocolate Chunk Cookies, Homemade Dog and Cat Treats, and some festive Chocolate Covered Pretzels.  In order to make sure that they were fresh for the holidays, I froze a batch of both kinds of cookies.  They freeze very well.  All you need to do is let them cool completely (and I mean completely, don't get antsy), and put them in zip top bags.  Put wax paper between the layers of cookies, and squeeze out all of the air.  Then pop them in the freezer!  Anyway, on to the cookies.


This recipe was found on the blog Food~Fitness~FreshAir.


You'll need:


2 cups whole wheat flour
1 tsp baking soda
1 tsp baking powder
1/2 tsp salt
1 1/2 cups rolled oats
2 sticks butter, room temperature
3/4 cups granulated sugar
1 cup brown sugar, firmly packed
1 tsp vanilla extract
2 large eggs
12 oz. semisweet chocolate chips
1 cup thin salty pretzels, broken into small pieces
1/2 cup salted peanuts, halved or roughly chopped


Preheat the oven to 350 degrees F.


In a large bowl, mix together the flour, baking soda, baking powder, salt, and oats.


In another large bowl (or your stand mixer), cream together the butter and sugars.  Add the vanilla and eggs, and beat until thoroughly combined.


Slowly add the dry ingredients to the wet, mixing until just combined.  Stir in the chocolate chips and peanuts.


Spray your cookie sheet(s) with cooking spray.  Place ~2 tbs dough balls, slightly flattened on the cookie sheet.  Sprinkle the pretzel pieces on top, pressing them into the dough slightly.  Bake 12-13 minutes, until edges are golden brown.


Makes 3 - 3 1/2 dozen cookies.


My apologies for the hastily taken photo (even more so than usual...).  I had fully intended to blog about these cookies prior to Christmas, but obviously didn't, and photographing them didn't occur to me until I was setting them out to be consumed on Christmas day.  

The verdict?  These cookies were a bit different, but good!  They're nice and chewy, but still have the crunchy elements, too.  I like to delude myself into thinking that these cookies are healthy-ish, since they're made with oats and whole wheat flour.  Don't burst my bubble, please.  

The pretzels give them a little extra something.  Although next time I make them I might try crushing up more pretzels and mixing them in with the dough.  And I'd definitely add more peanuts and chocolate chips, too.  If you're in the mood for some slightly different chocolate chip cookies, give these a shot.  Enjoy!

Monday, December 26, 2011

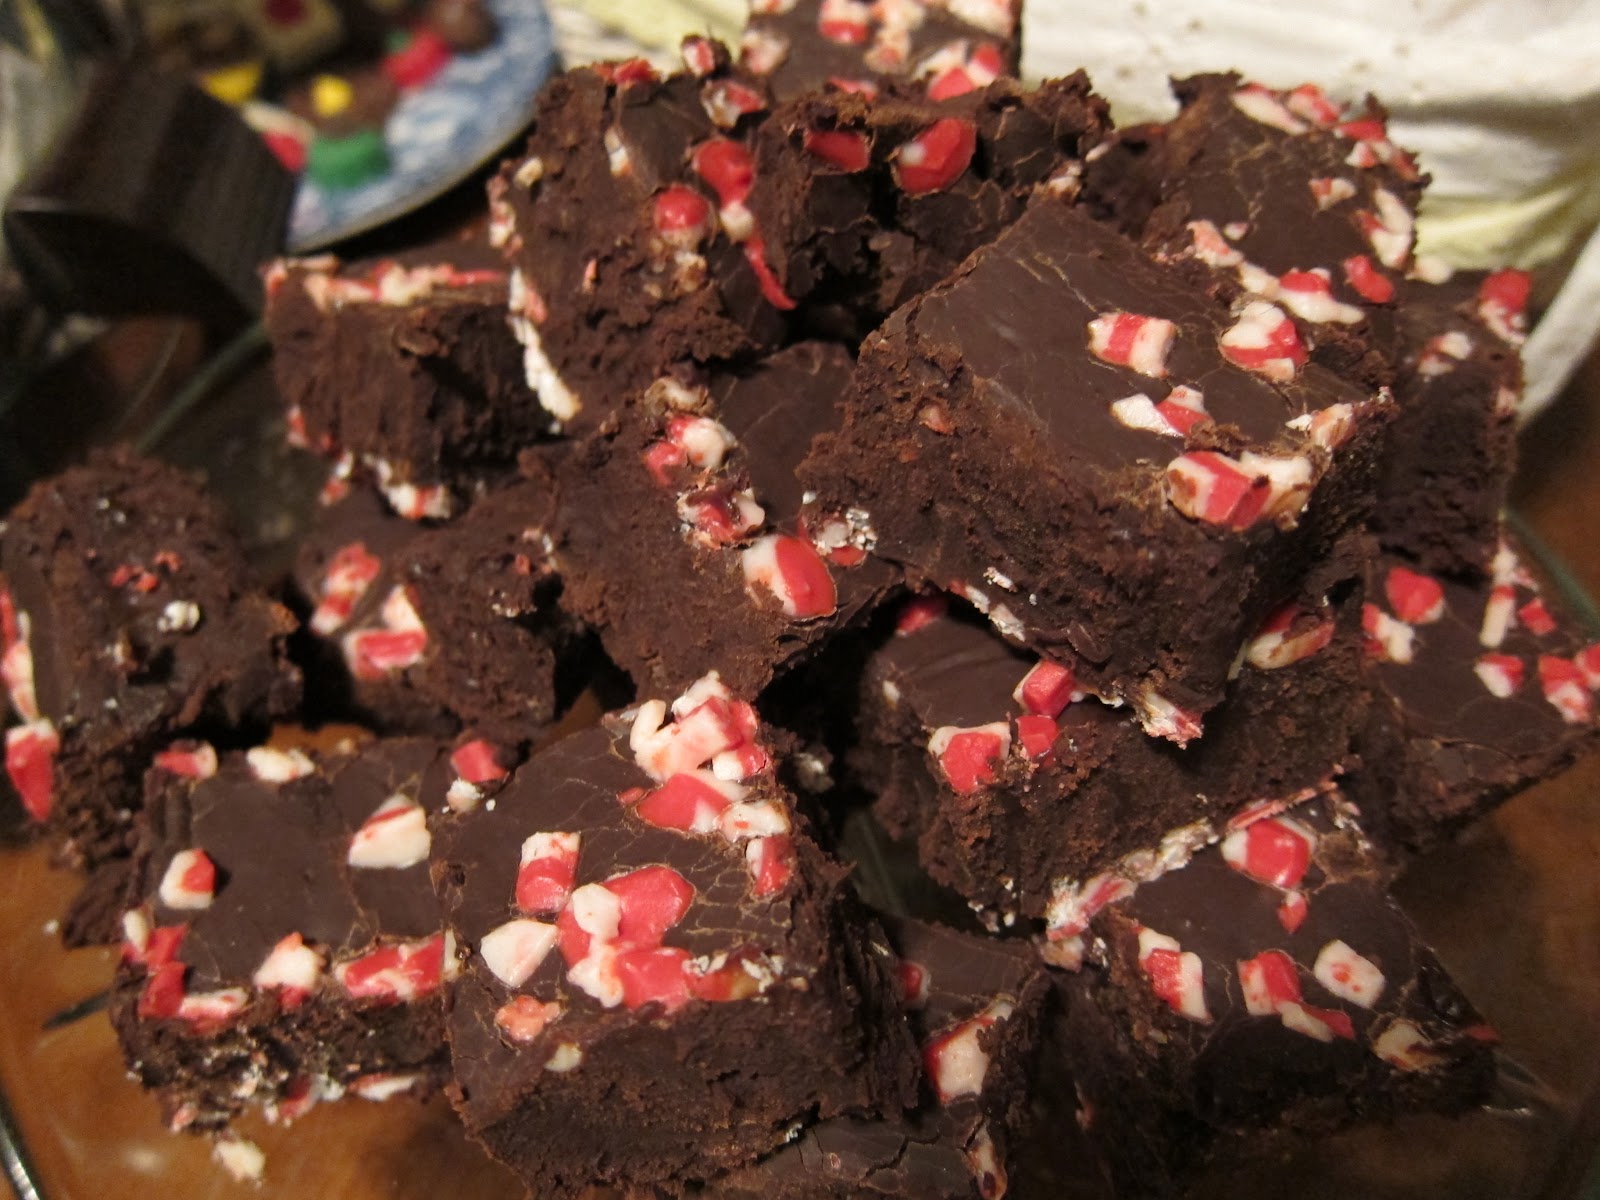
Dark Chocolate Peppermint Fudge

Dark Chocolate Peppermint Fudge.  Ya heard.  Plus a short roundup of how the Pacek family Christmas went (our first Christmas as a married couple!).


Between visiting Sean's grandparents up in Punxsutawney, PA (yes... where the groundhog lives...) on Christmas Eve and spending a very relaxing Christmas day at my parents' house, we had an extremely enjoyable holiday.  Everyone is healthy and doing well, so I can't complain there.  I just wish I had thought to take more pictures of the food, because it was awesome: homemade pierogies, sauerkraut, turkey roll, mushrooms at his grandparents' and pork tenderloin, mashed potatoes, some tasty shrimp-filled wontons, and a ton of cheese at my parents'.  I may have overindulged.  Just a little.  Have I mentioned that I am borderline obsessed with cheese?
Left to right: horseradish, salsa jack, and apple-cinnamon.  This makes me happy.
We both got some really nice stuff, too.  Among other things, we received new luggage (badly needed), some books and clothes, and my parents got us an ice cream maker attachment for my KitchenAid mixer.  Be on the lookout for some ice cream recipes in the fairly near future!  My mom also picked me up a copy of Ree Drummond's The Pioneer Woman Cooks: Recipes from an Accidental Country Girl.  So... yeah.  Be on the lookout for a lot of PW recipes, too.  She has some really great looking recipes in this cookbook.  Maeby made out pretty well, too.  Gram Tam (my mom) got her a nice container to keep her dog food in (and of course it's red to match my kitchen!), a well as some treats and a new Nylabone.  She was a happy little girl.


Anyway, on to what you're really here for: the recipe.  I found this recipe on the blog A Spicy Perspective, and not only is it delicious, it is incredibly easy to make.  I don't know why the word "fudge" always conjured up images of some ridiculously complicated preparation in my mind, but that's definitely not the case.  


You'll need:


14 oz. can sweetened condensed milk
1 tbs butter, plus extra for greasing dish
1 lb. dark chocolate chips/chunks
1/4 tsp salt
1/4 tsp peppermint extract
1 tsp vanilla extract
1 cup Andes Peppermint Chunks


Grease an 8x8 baking dish.  Sprinkle half of the peppermint chunks into the bottom of the dish and set aside.


Place a medium sauce pot over medium heat with about 2 inches of water.  Place a glass bowl over the top, making sure the glass bowl doesn't touch the water.  You've just created a double-boiler.


Pour the condensed milk and butter into the bowl and heat.


Add the chocolate and salt to the bowl.  Stir the chocolate until it melts and thickens.  The mixture should be pretty thick, like a thick cake batter.


Add the extracts and mix well.  


Pour the mixture into the baking dish.  Gently tap the dish on the counter for a minute or so.  This will help release any air bubbles that are trapped under the surface.  


Sprinkle the remaining peppermint chunks over the top and refrigerate for at least 3 hours, and possibly longer, until the fudge sets.


To cut, dip a knife in hot water, wipe off, and cut quickly.  You can dip and wipe between cuts (you'll probably need to).  Cut fudge into desired shape and size.  I think I ended up cutting mine into 30 square pieces.  I do feel obligated to say that I had a devil of a time cutting this up and getting it out of the pan.  Is this always the case with fudge, or am I just challenged in this arena?


Despite having difficulty making very neat cuts, the fudge came out very well (if I do say so myself), and was smooth and creamy.  The chocolate/peppermint combination was perfect.  I admit that I had to order the Andes Peppermint Chips on Amazon.com, since I simply couldn't find them in Baltimore.  They're pretty cool, though.  I kept eating them out of the bag as I made the fudge.  They put me in mind of the big, soft, individually-wrapped peppermint balls, only softer.  Delicious.


I realize that this is sort of a Christmas-y fudge, but you could definitely get away with making it through the remainder of the winter, and no one would complain.  Or, heck, put this recipe in your back pocket for the next holiday season!  Either way, I hope you enjoy it as much as we did.

Sunday, December 18, 2011

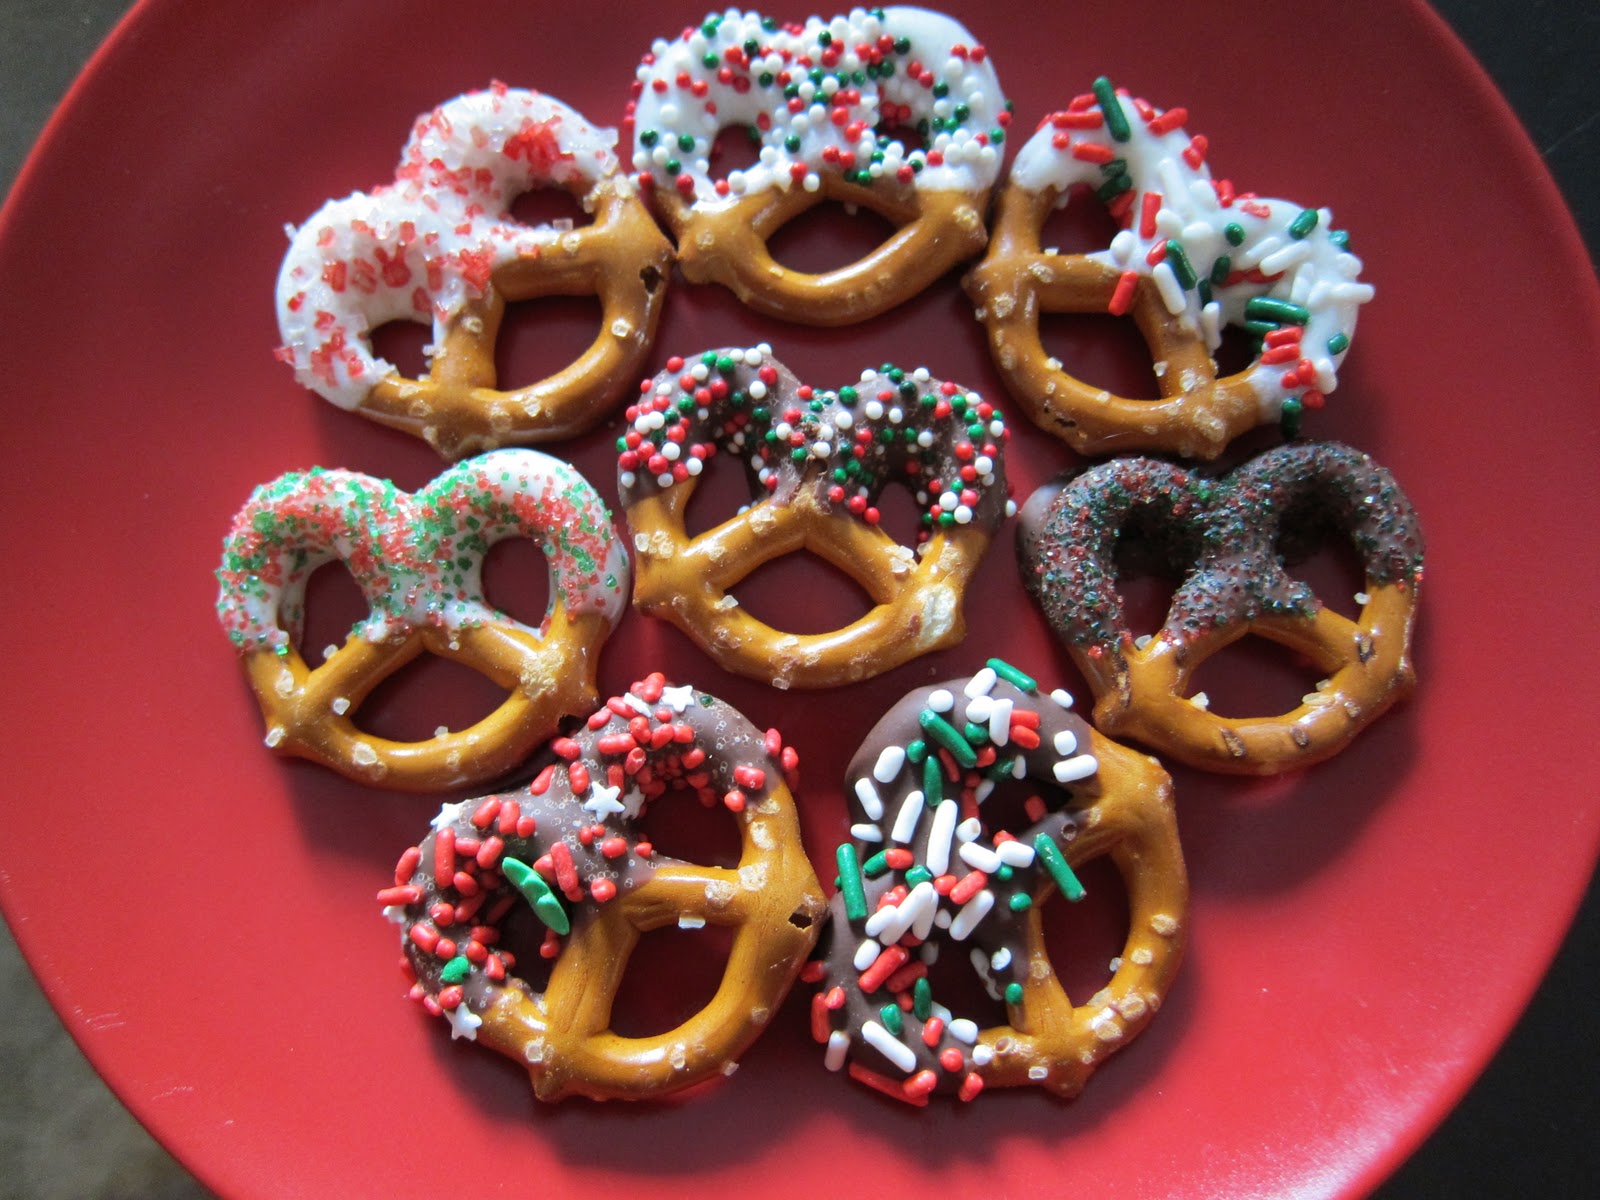
Chocolate Covered Pretzels

 Festive chocolate covered pretzels, at that.  =D I don't really think any one person can lay claim to the chocolate covered pretzel, so I can't attribute the inspiration for this post to any particular person/blog.  However, I did happen to see some super cute chocolate covered pretzels very recently, posted by Kim, on the blog Feed Me, Seymour.  Please swing by her blog if you haven't done so already.  You'll be happy that you did!


Every year during the month of December (and sometimes a little earlier than that) I become acutely aware of the fact that the holidays are approaching.  I mean, aside from seeing nonstop commercials and ads and whatnot, I start to feel Christmas-y.  That hasn't happened yet this year.  I obviously know that Christmas is 1 week away, but I'm still not feeling it.  Maybe it's because the weather has been pretty warm lately, or maybe it's because I've just been busy with school and have only recently been able to pull my head out of my ass.  Who knows.  Regardless, I'm not feeling the holiday spirit quite as much as I'd like.  That's where these chocolate covered pretzels come in.


Sean was out of town this weekend, so I took that as my chance to spend (probably) too much time in the kitchen.  Perhaps some baking would help put me in the holiday mood?  It did... a little.  Cranking up the holiday music and helping some friends decorate their tree helped too. =)  These chocolate covered pretzels are really easy to make, and look pretty impressive, or at least I think that they do.  You can use different colored sprinkles for different holidays, too.


You'll need:


chocolate chips/chunks (whatever kind you'd like)
pretzels
assorted sprinkles


Melt your chocolate chips in a double boiler, or, do like I did.  Place them in a glass bowl and microwave in 30 second increments, stirring frequently.  You can add a little butter or a smidge of vegetable oil to the chocolate too, if you like.  I added a little bit of vegetable oil.


Dip pretzels in chocolate, allow excess chocolate to drip off, and apply sprinkles!


It's that easy. =)  Let them cool and the chocolate set.


I would, however, make a few recommendations: 


1) Put some parchment paper on a cookie sheet.  It will provide a relatively non-stick surface on which your pretzels can dry.  


2) For the love of all things holy, apply the sprinkles to the pretzels over a baking dish.  Otherwise you're going to have a mess on your hands.  I used a 13x9 Pyrex dish.


3) If you use milk chocolate chips or chunks, put the cookie sheets in the fridge while the chocolate sets up.  Otherwise it will take a really long time to set up (or at least mine did).


I used milk chocolate and white chocolate chips.  Although I'm a bigger fan of eating milk chocolate, I thought that the white chocolate ones came out looking better.  It's easier to see the sprinkles against the white chocolate background, and white is more festive than the milk chocolate.
Here's the whole assortment =)


Pretty cute, huh?  Plus check out the adorable penguin bowl I have them sitting in!  I couldn't resist.  Whip some up for a holiday party, for friends, or just for yourself.  Enjoy! 

Sunday, December 4, 2011

Orange Chocolate Stout Cake

Yesterday was my friend Emily's birthday.  Earlier in the week, she had asked if I would mind baking her cake.  Of course I didn't mind!  Baking is great on its own, and I thoroughly enjoy that.  However, baking for a friend is exponentially better.


So last night we went over to her place for some champagne and cake before heading out for margaritas and entirely too much food.  A big "thank you" should go to Sean, too, since he was gracious enough to give me some of his beloved Guinness for this cake.

Sean harassed Lola while we were there, too.  Can't you tell that she's thrilled?
I'd like to thank Evil Shenanigans for this recipe.


You'll need:


1 1/2 cups all purpose flour
2/3 cups cocoa powder
1 tsp baking powder
1/2 tsp baking soda
1/2 tsp salt
1 1/2 cups sugar
1 stick butter, melted
1 cup stout beer (I used Guinness), room temperature
4 eggs
1 tbs orange zest
1/3 cup orange juice (freshly squeezed, please!)
1 tsp vanilla


1 1/2 sticks butter
4 1/2 cups powdered sugar
1 tsp vanilla
1/4-1/3 cup milk


This can be made into a sheet cake (what I did) or into a round layer cake using two 8 inch cake pans.  If you're interested in going the layer cake route and need some guidance, please see the original post.


Preheat your oven to 350 degrees F.  Spray a 9x13 inch pan with cooking spray.


In a large bowl, whisk together the flour, cocoa powder, baking powder, baking soda, salt and sugar.


In another bowl, combine the melted butter, beer, eggs, orange zest, juice, and vanilla.


Pour the wet ingredients over the dry and mix until well combined and no large lumps remain.  Be careful not to over mix.


Pour the batter into the pre-greased pan and bake for 30-35 minutes, or until a toothpick or knife comes out clean once inserted into the center.


Let the cake cook completely.


While the cake cools, start on the frosting.  In a small pan over medium heat, melt the 1.5 sticks of butter until it is nut brown.  Make sure to keep stirring the butter almost constantly. Allow the butter to cool to room temperature.


Beat the butter, powdered sugar, and vanilla until combined.  It's probably going to look pretty clumped up at this point.  Add in the milk, little by little, until you've reached the desired consistency.  Once the cake has cooled you can go ahead and frost it.


This cake itself was fudgey and pretty moist, and not overly sweet.  The orange flavor really came through, too.  The frosting was pretty sweet on its own, but was balanced by the not-so-sweet cake, and the whole thing seemed to go over pretty well!    

Thursday, December 1, 2011

Oreo Chocolate Chunk Cookies & World AIDS Day 2011

Hi everyone.  It's not often that I'll get up on a soapbox in this forum, and I promise to keep it brief.  And I know that this is a food blog, and that HIV/AIDS and tasty food aren't the most palatable combination.  But today is World AIDS Day 2011.  For those of you who do not know me in real life, the majority of my time is taken up by working on my PhD at the Johns Hopkins Bloomberg School of Public Health, where I am extremely interested in  HIV prevention and working to improve the lives and health of persons living with HIV/AIDS.  


World AIDS Day is about raising money, increasing awareness, fighting prejudice, and improving education regarding HIV-related issues.


2011 marks 30 years since the beginning of the AIDS epidemic.  Since 1981, more than 60 million people have become infected with HIV, and more than 25 million lives have been claimed by AIDS.  Currently, it is estimated that 33 million people are living with HIV worldwide, yet only about half of these people know their HIV status.  Not a single country in the world has escaped the devastation of this truly global epidemic.


Please consider joining the effort and doing your part in Getting to Zero.  Your can get involved in a wide variety of ways: Become informed, get tested, be compassionate, donate, and so on.


Alright *stepping off of soapbox and putting it away*.


Actually, one more thing... Not that I've run into this kind of negativity yet (no one cares enough to be negative, hahaha), but if HIV/AIDS prevention is not something that's important to you or if you have some disparaging remark to make, please save your fingers the extra work and keep it to yourself.  K?  Thanks!


Now, to the cookies!


I really wish I had had enough time this week to come up with something World AIDS Day-related... but alas, these cookies are all I have for you.  Next year I'll try to budget my time a little better.  Anyway, I found the recipe for these ridonkulous Oreo Chocolate Chunk Cookies here, at Butter Baking.  Looking at the recipe now makes me want to whip up another batch right now.  If you haven't yet, go check out her blog!  She has some other cookies similar to these ones that look ah-ma-zing too!


You'll need:


2 sticks butter, softened
1 cup brown sugar
1/2 cup white sugar
2 eggs
1 tsp vanilla
2 1/4 cups flour
2 tsp salt
1 tsp baking soda
1 1/2 cups chocolate chips
1/2 cup white chocolate chips
15 Oreos, roughly chopped into ~6 pieces each


Preheat your oven to 350 degrees F and line a couple of baking sheets with parchment paper.  Beat the butter and sugars together using your stand mixer (or handheld electric mixer) until combined.  Add the eggs and vanilla and mix until incorporated.


Mix in the flour, salt, and baking soda on low speed until combined.  Add the chocolate chips and the Oreo pieces and mix until just combined.  Try to resist eating all of the dough right now.  Seriously, it is so so good!  Try it! 


Scoop tablespoons of the mixture onto the parchment-lined cookie sheets and bake for about 10 minutes, or until the edges are just golden.


Honestly, these are some of the best cookies I've ever made and eaten.  They taste like cookies and cream.  Please try them, you won't be disappointed!!

When telling my mom about these cookies, she (in a stroke of genius) suggested that I use those mint-flavored holiday Oreos or Trader Joe's Joe-Joes in place of the plain Oreo cookies to jazz them up for Christmas.  Don't think that I won't be doing that in just a few weeks.

Tuesday, October 18, 2011

Banana Peanut Butter Muffins with Chocolate Chips

I decided to seek out a recipe for a banana-based baked good in response to pleas from my family that I stop posting about pumpkin.  I'll appease them... for now.

This recipe was adapted from the one found here.

You'll need:

1/2 cup plus 2 tbs all purpose flour
1/2 cup whole wheat flour
1 tsp baking powder
1/2 tsp baking soda
1/4 tsp salt
2 ripe bananas, mashed
6 tbs peanut butter (creamy or chunky will do)
1/2 cup brown sugar
2 tbs honey
1 1/2 tsp vanilla extract
1 large egg
3/4 cup chocolate chips


Preheat the oven to 375 degrees F.  Prepare your muffin tin by greasing the cups or inserting muffin liners.


Stir the flours, baking powder, baking soda, and salt together in a medium bowl.  Set aside.


Mash the banana, peanut butter (I used chunky, because I love me some chunky peanut butter), brown sugar, honey, vanilla, and egg together in another bowl.  


Pour the wet mixture into the dry and stir until just combined.  Add your chocolate chips and stir to combine again.


Fill the muffin tins ~3/4 of the way full.  Bake 20-22 minutes, or until golden brown and a toothpick comes out clean.


I got 10 muffins out of this recipe.


C'mon now, peanut butter and banana?  And then you add in some chocolate?  These are great.  The outside is a little crisp, and the inside is moist and chewy, just the way a muffin should be.  

If you wanted to get those nice, bakery-style domes on top of the muffins you could fill the muffin liners up to the brim.  But then you'd have fewer muffins.  It's your call.  You could always double the recipe if you wanted to have plentiful and tall muffins ;).  Enjoy!

Thursday, October 13, 2011

Pumpkin Chocolate Chip Scones

When I spied this recipe on Foodgawker, I nearly cried tears of joy.  Okay, not really.  That's a little excessive.  But I really was mega-excited about it.  Pumpkin in scone form?  Why didn't I think of this before?  And then add in some chocolate and nuts?  Don't mind if I do!  


A big "thank you" to Jo Cooks for this one!  I've adapted the recipe ever so slightly.


You'll need:


2 3/4 cups all purpose flour
1/3 cup sugar
1 tbs baking powder
3/4 tsp salt
3/4 tsp ground cinnamon
1/4 tsp ground ginger
1/4 tsp nutmeg
1/4 tsp ground allspice
1/2 cup (8 tbs; 1 stick) cold butter, cut in cubes
1 cup chocolate chips
1 cup combination of pecans and walnuts, chopped
2/3 cup canned pumpkin puree (NOT pumpkin pie filling)
2 large eggs
milk for brushing tops of scones
sugar for sprinkling on top of scones


In a large bowl, mix all of the dry ingredients together, including the sugar and spices (but not the sugar used for sprinkling, obviously).  


Add the cubed butter, and using a pastry cutter (or two knives, or a food processor if you don't have a pastry cutter), cut the butter until it resembles small peas.  


Add the pecans and chocolate chips to the butter/dry ingredient mixture and lightly mix.


In another bowl, mix the pumpkin puree and egg.  Add the pumpkin and egg to the dry ingredients.  Use a spatula to mix everything together.


Form the dough into 1 big disc, or 2 smaller discs (either way they should be ~3/4 inch in thickness).  If you made 1 big disc, go ahead and cut it into 8 triangles, just as if you were slicing a pizza.  If you made 2 smaller discs, slice into 6 triangles a piece, in the same pizza-cutting fashion.


Preheat the oven to 425 degrees F.


Lay your scones on a cookie sheet covered in parchment paper (or a Silpat, if you have one).  Place the tray in the freezer for approximately 30 minutes, so the scones can set.


After the 30 minutes is up, remove from the freezer, brush the tops with a little milk, and sprinkle with some sugar.  Bake the scones for 20-25, or until you can insert a toothpick or sharp knife and it comes out clean.  


Yum!  These were so good.  Sean and a friend helped me eat these, which was a good thing.  Otherwise I would have polished them all off myself in about 2 days.  Enjoy!!

Monday, October 10, 2011

Baked Chocolate Doughnuts

So... yeah.  I know I defiantly stated that I'd be making pumpkin doughnuts this weekend, Sean's opinion be damned!  Just forget all about that.  I instead opted for some chocolate doughnuts that we would both enjoy equally.  There's plenty of time for pumpkin doughnuts, anyway =).


This recipe was found at Handle the Heat, and originally came from Lara Ferroni.  


I doubled the recipe listed at Handle the Heat, so keep that mind.  The doubled recipe is as follows, and yielded approximately 18 doughnuts.


You'll need:


Doughnuts
2 cups all purpose flour
4 tbs natural cocoa powder
2 tsp baking powder
1/2 tsp baking soda
2/3 cup granulated sugar
1 tsp nutmeg
1 tsp salt
4 tbs butter
1/2 cup buttermilk
1/4 cup plain yogurt or sour cream
2 tsp vanilla extract
2 eggs
glaze or frosting (optional; see below)
sprinkles (optional)


Frosting (if you can call it that)
2-3 oz. chocolate chips/peanut butter chips/some combination of the two
1 tsp vegetable oil


Preheat the oven to 350 degrees F.  Grease your doughnut pan (or a muffin pan would do here in a pinch if you don't have a doughnut pan).


In a large bowl, sift together the flour, cocoa powder, baking powder, and baking soda.  Whisk in the sugar, nutmeg, and salt.  


Add the butter.  Using your fingers, rub it into the dry ingredients until it becomes coarse crumbs.  In an effort to avoid having to handle butter with my bare hands (something about it makes my skin crawl a bit), I tried using my food processor to "cut" the butter into the flour mixture, and it actually didn't work out so well.  I ended up needing to just get my hands dirty anyway, so just dig on in.


In a separate medium-sized bowl, whisk together the buttermilk, sour cream/yogurt, vanilla, and eggs.  Add it to the flour mixture and stir until just combined.  Resist the urge to overmix, lest your doughnuts end up being rubbery!


Now it's time to fill your doughnut pan.  You have a couple of options at this point.  1) Fill a ziploc bag with the batter, cut one corner off of the bag, and pipe the batter into each cup; 2) Use a spoon to fill the doughnut cups with batter.  Either way, make sure to only fill them 1/2-3/4 of the way full.  Any more than that and the doughnuts will puff up so much that you don't have a hole in the middle anymore.


Bake for 8-10 minutes, or until the dough springs back when you press on it lightly.  Let them cool slightly on a rack before frosting.


While they're cooling down, put your chocolate chips and vegetable oil in a small microwave safe bowl and heat in 30 second intervals, stirring in between, until the chocolate has all melted and is smooth and shiny.  Dip your doughnuts into the melted chocolate, place on a wire rack, and top with sprinkles if desired!  You can let the doughnuts sit for a bit so that the chocolate hardens a bit, and is less messy.  


Make sure to re-grease the doughnut pan between batches.  Even though my pan is non-stick, I didn't re-grease between the 1st and 2nd batches and some of the doughnuts really stuck to the pan.  When I tried to pop them out, some fell apart.  


Adorable, right?  The ones on the left have plain chocolate frosting and chocolate sprinkles, while the ones on the right are frosted with a mixture of melted chocolate chips and peanut butter chips.  Next time I think I'll frost some solely with peanut butter frosting, and will definitely try to have some more exciting sprinkle options on hand.

My taste testers (not Maeby this time, don't worry) and I agree--these are delicious!!  In case anyone was wondering, as noted on Handle the Heat and on Lara's blog, the addition of nutmeg to these doughnuts is really necessary.  It gives them a recognizable doughnut flavor.  Without it, they would just end up tasting like chocolate cupcakes rather than doughnuts.  Not that chocolate cupcakes are a bad thing... but we're going for doughnuts here, people! =)

For those of you who don't have a doughnut pan, I'd highly recommend picking one up.  They're really inexpensive, and a lot of fun.  I found mine for about $10.  I hope you get the chance to try these out!


If anyone does happen to try them, and gets a little creative with the toppings or modifications to the recipe itself, please let me know how it goes!