."

Thursday, September 8, 2011

Roasted Garlic and Cauliflower Pasta

Adapted ever so slightly from the recipe at Mel's Kitchen Cafe.


I'll admit, I've never been a huge fan of cauliflower.  It's just never really done anything for me.  But this recipe appealed to me for several reasons: 1) I'm trying to cram more vegetables into my diet, 2) it has cheese (c'mon people), and 3) anything with 2 full heads of roasted garlic just has to be good.  Forget what you know about cauliflower.  If you've never had it roasted in the oven, you don't know what you're missing.  It does something really nice to the cauliflower, and makes it almost nutty tasting.  I'm a cauliflower convert now.  Even my picky-when-it-comes-to-vegetables husband liked it!  It made a delicious side dish paired with some grilled chicken.


You'll need:

2 heads garlic, skins removed, top quarter of heads cut off (on the pointy side of the garlic) and discarded
6 tbs plus 1 tsp extra-virgin olive oil
1 head cauliflower (roughly1 1/2 pounds)
1 tsp salt
1/4 tsp pepper
1/4 tsp sugar
1 pound short cut pasta (For example, fusilli, rotini or campanelle. We used cute mini rotini.)
1/4 tsp red pepper flakes
 1 tbs fresh parsley leaves, chopped
2 oz. Parmesan cheese, grated or shredded (about 1 cup)
1/4 cup chopped walnuts, toasted


Adjust an oven rack to the middle position, place a large rimmed baking sheet on the rack, and heat the oven to 450 degrees Fahrenheit.
Cut one 12-inch sheet of foil and spread it flat on the counter. Place the garlic heads, cut-side up, in the center of the foil. Drizzle ½ tsp olive oil over each head and fold up the sides of the foil to seal well. Place the foil packet directly on the oven rack (not on the preheating baking sheet) and roast until the garlic is very tender, approximately 40 minutes. Remove the foil packet from the oven, open the foil and set it aside to cool.
Come to mama.

While the garlic is roasting, trim the outer leaves of the cauliflower and cut the stem flush with the bottom. Cut the head from pole to pole into 8 equal wedges and then cut the cauliflower into large bite-sized pieces. Place the cauliflower in a large bowl or in a zip top bag; toss with 2 tablespoons oil, salt, pepper, and sugar.
Pre-baking.

Remove the hot baking sheet from the oven. Carefully transfer the cauliflower to the baking sheet and spread into an even layer. Return the baking sheet to the oven and roast until the cauliflower is well browned and tender, 15 to 20 minutes.  It took mine about 20 minutes.
Post-baking.  Look at that golden brown goodness.

While the cauliflower roasts, bring 4 quarts of water to a boil in a large pot. Add 1 tbs salt and pasta; cook until al dente. Squeeze the cooled, roasted garlic cloves from their skins into a small bowl. Using a fork, mash the garlic to a smooth paste, then stir in red pepper flakes and 2 tbs lemon juice. Slowly whisk in remaining 1/4 cup oil.
Drain the pasta, reserving 1 cup cooking water, and return the pasta to the pot. Add the chopped cauliflower to the pasta; stir in the garlic sauce, ¼ cup cooking water, parsley, and ½ cup cheese. Adjust the consistency of the pasta with additional cooking water and season with salt, pepper, and additional lemon juice to taste. Serve immediately, sprinkling with remaining ½ cup cheese and toasted nuts.

Seriously though, check out Mel's picture, because my atrocious photography doesn't do this justice.  Shoddy photography aside (c'mon guys, I'm a grad student and make peanuts... I can't afford a nice camera! =) ), this is really really good.  Even if you think you don't like cauliflower, give it a shot!  You won't regret it!

Wednesday, September 7, 2011

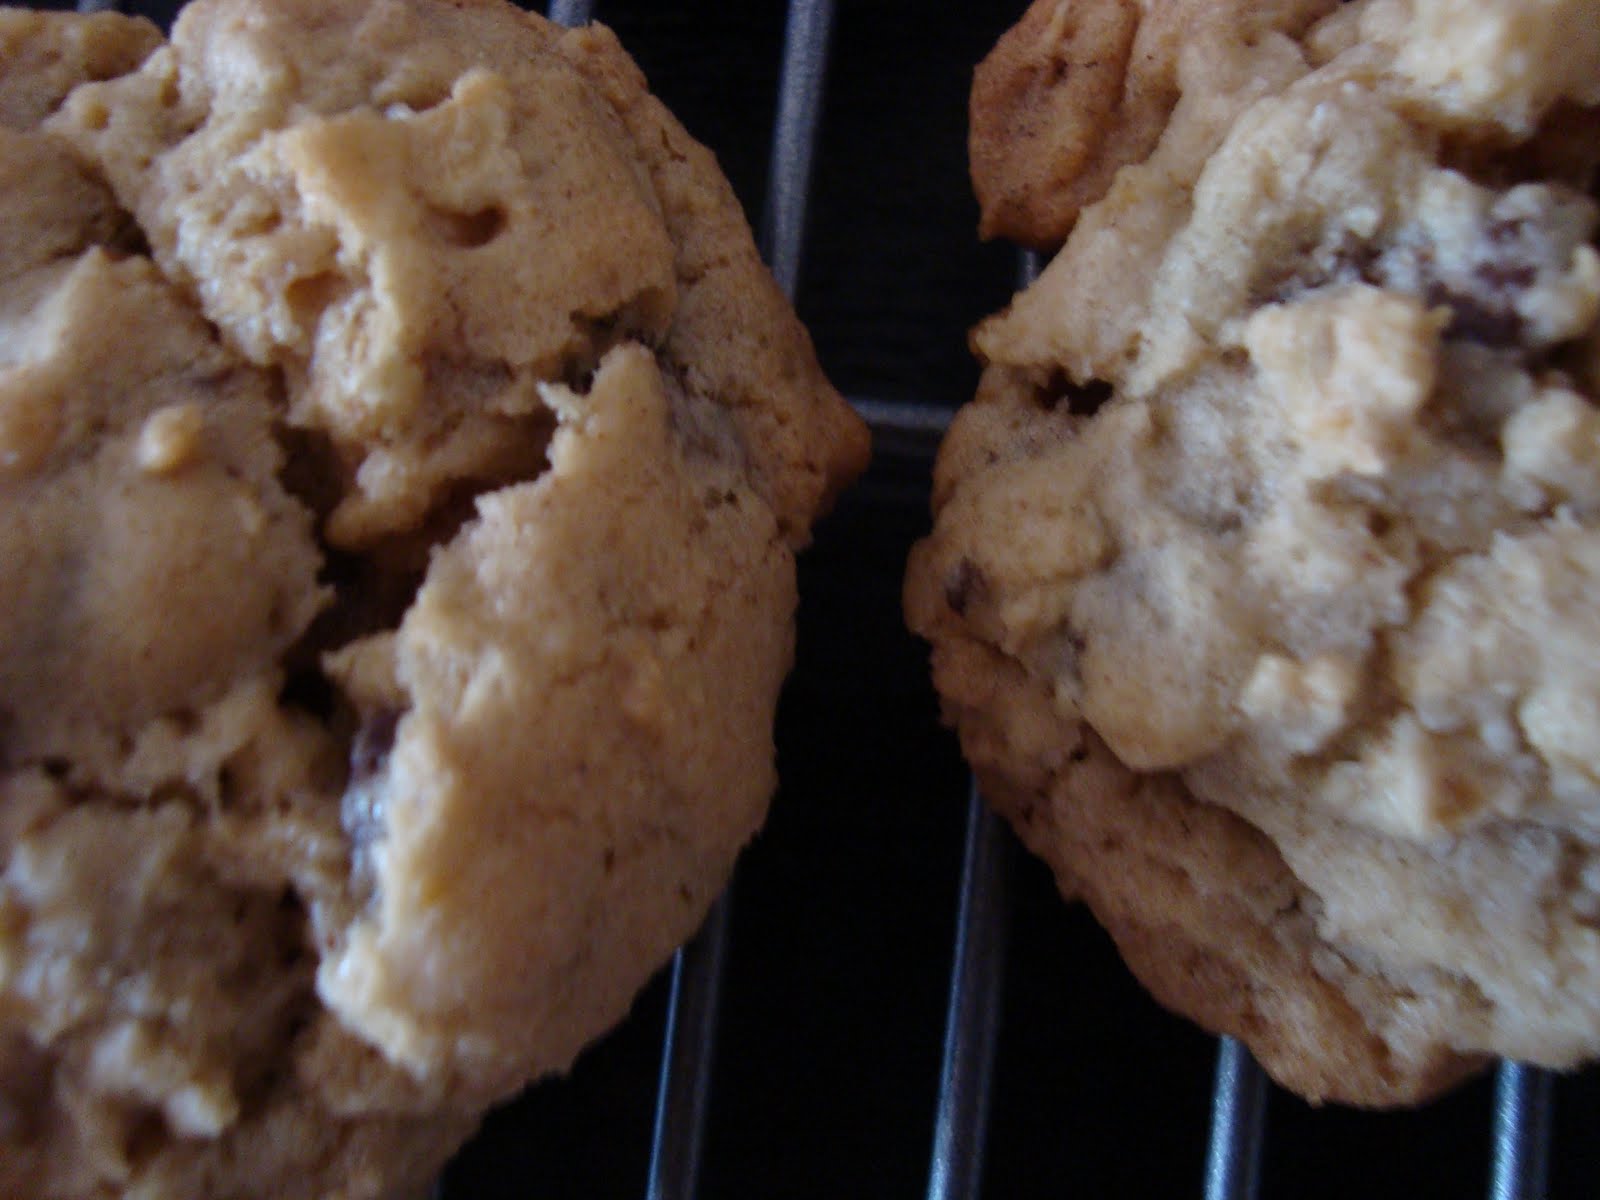
Oatmeal Chocolate Chip Walnut Cookies

Greetings from a very soggy Baltimore/DC area!  It's been raining and really dreary all day long, and it doesn't look like it's going to let up for the next couple of days.  Yuck.  Anyway, I thought we could all use a tasty cookie recipe to brighten our moods.


I made these over the weekend on an impulse.  And I'm glad that I did.  They're a nice change of pace from the regular old chocolate chip cookie (not that there's anything wrong with plain chocolate chip cookies! =P)  


This recipe is adapted from the always nomtastic Smitten Kitchen.  Her recipe calls for orange zest, pecans, and ground cloves.  I either omitted entirely or subbed different ingredients for all of these, as I just didn't have them on hand.  


You'll need:


8 tbs (1 stick) unsalted butter, at room temperature
3/4 cup granulated sugar
1 cup light brown sugar, packed
1 tsp salt
1 tsp vanilla extract
2 large eggs
1 1/2 cups flour
1 tsp baking soda
1/2 tsp ground cinnamon
1/4 tsp ground nutmeg
1 cup quick-cooking oats
2 cups walnuts, chopped
6 oz. semi-sweet chocolate chips
6 oz. white chocolate chips


Preheat your oven to 350 degrees Fahrenheit.  Line cookie sheets with parchment paper or a non-stick baking mat (like a Silpat).  


Using an electric mixer, beat the butter in a bowl until light and fluffy.  Add both sugars, salt, and the vanilla, and beat until well mixed (approximately 3 minutes).  Stir in the eggs, one at a time.


In another bowl, sift together the flower, baking soda, cinnamon, and nutmeg.  Add half of the flour mixture to the butter and sugar mixture, and mix on low speed.  Once this has been incorporated, add the other half of the flour mixture.  Stir in the oats, walnuts, and chocolate chips.  


The dough is really good.  Go on, try it!


Drop the dough, by the rounded tablespoon (I used a melon baller) onto the cookie sheets and bake for 10-12 minutes or until golden.  Remove from the oven to a rack to cool.  Store at room temperature in a cookie jar or in an airtight container.


All-in-all, I would definitely make these again!  The cinnamon and nutmeg really take these to a different level.  These cookies were a bit crispy on the outside, but chewy on the inside.  I was able to get 54 cookies from this recipe.

Tuesday, September 6, 2011

Mexican Chicken Baked Potatoes

Two posts in one day?!  Scandalous, right?


Along with the return of autumn comes the new school year.  My cousin recently started her first year of college, and my brother just transferred to a new school.  As a result, both are now students at my alma mater, The University of Pittsburgh.  Now don't get me wrong, I'd be happy for and proud of them regardless of where they chose to go to school (and I am!!), but I'm particularly excited that they both chose Pitt.  I loved my time there, and have found myself getting a little nostalgic from time to time for the sights, sounds, people, and foods that I came to know and love.


The Cathedral of Learning, on Pitt's campus


When giving my brother recommendations for restaurants the other day, the restaurant Vera Cruz came to mind.  Vera Cruz is this little Mexican place on Forbes Avenue, close to the intersection of Forbes and Atwood St.  They don't have a website, or I'd link it here.  Now, this place isn't going to be rated by Zagat's or anything, but it was cheap, fast, close to campus, the people were always friendly, and above all else: tasty.  They had all of the Mexican foods you'd expect: tacos, quesadillas, and so on.  But they also had these baked potatoes loaded up with cheese, sour cream, black beans, tomatoes, other assorted toppings, and your choice of meat.  I always got the chicken baked potato.  


Anyway, I thought this would be easy enough to recreate in my own kitchen.  The following recipe is for 2 people, but you can easily adapt it for 1 or many.


You'll need:


2 large baking potatoes, scrubbed and dried
2 small or 1 medium chicken breast, chopped up
1 tomato, diced
Sour cream
1 can black beans, rinsed and drained (although you're probably not going to use this whole can unless you're a black bean fiend like me)
Shredded cheese
2/3 cup water
1 tbs vegetable oil or butter
Homemade taco seasoning (recipe below), or 1 packet store bought taco seasoning
Any other toppings you'd like!


Homemade Taco Seasoning
1 tbs chili powder
2 tsp onion powder
1 tsp ground cumin
1 tsp garlic powder
1 tsp paprika
1 tsp dried oregano
1 tsp sugar
1/2 tsp salt


I didn't have onion powder this time around, but the taco seasoning was really good anyway.


Preheat your oven to 350 degrees Fahrenheit.  Make sure to pierce your potatoes a few times with a fork after washing and drying them off, but before starting to cook them.  I like to give my potatoes a head start in the microwave so that they don't take quite as long in the oven.  So I nuke them for 6-7 minutes in the microwave before wrapping them in some foil and sticking them in the preheated oven for 30 minutes or so, depending upon how large the potatoes are.


While the potatoes are baking, start by gathering your spices and mixing the homemade taco seasoning in a bowl.  Set that aside.  Cut your chicken up into bite sized pieces.  Heat a skillet with a little bit of oil or butter in it, and toss the chicken in.  Cook until there's no more pink in the middle.  Once your chicken is cooked, add the taco seasoning and water.  Stir to coat everything, and then let it reduce a bit, just like you would do if you were making tacos from a boxed kit.


Once your potatoes are done baking, slit them open and fluff up the insides a bit.  Then stuff them with whatever toppings your little heart desires!


It's not the prettiest picture, but boy was this tasty.

After taking that picture, I tore into that potato in a way that I'm not entirely proud of...  

Social Networking Update!

Hi everyone!  I just wanted to quickly post and let you all know that you can now follow me on Twitter @heywhocutcheese.  Also, I recently started a Facebook page for the blog.  If you're so inclined, please "like" the page that is aptly titled "Hey, who cut the cheese?"


Of course you always have the option to subscribe to my blog via email right here on my blogger page.  


I've been having a lot of fun blogging and sharing with you, and I hope you've been enjoying it too!  Thank you for reading! =)  

Monday, September 5, 2011

Caprese Salad Pasta

This was really intended to be made with leftovers from a Caprese salad (see previous post), but can definitely be made without the help of leftovers.  That being said, I have never, ever been this excited about eating leftovers.


This recipe isn't very exact, so you can modify it as you see fit based on how many people your'e serving, your personal preferences, and so on.


You'll need:


Tomatoes
Fresh mozzarella
Basil
Salt and pepper
Extra-virgin olive oil
(Or substitute leftover Caprese salad for the above ingredients)
2 cloves garlic
Your favorite pasta (I used mini penne because they're adorable!)


Separately, dice your tomatoes and mozzarella and set them aside.  


Set a large pot of water on the stove to boil.  Once it comes to a boil, cook the pasta according to the directions on the package.


Heat a little olive oil in a large skillet or sauce pan.  Mince the garlic and add to the pan.  Once the garlic is fragrant, add the diced tomatoes.  Allow them to simmer away.  Give the tomatoes a squish with the back of a spoon periodically.  The tomatoes will cook down and release their juices, making a nice simple sauce.  Toward the end of the cooking time, toss in some basil (either whole leaves, or chopped/torn/shredded/etc.).  


You can then add the cooked, drained pasta to the pan with the tomatoes.  Toss it up a bit, and then add the diced mozzarella cheese.  The cheese will likely melt a bit and become pretty stringy, and gooey.  It really is a thing of beauty.


Add a little more fresh basil on top, and you're good to go.

Sunday, September 4, 2011

Chunky Caprese Salad


From approximately April-December, there are a multitude of farmer's markets across Baltimore City.  Fortunately for us, one of them is located just a stone's throw away from our apartment and operates on Sundays.  We've been enjoying the market all summer, buying a variety of fresh vegetables and fruit, delicious prepared food, and doing some quality people watching.  

Though I really am welcoming the onset of autumn--I'm entirely over the summer heat and humidity--it makes me a little sad to realize that the delicious fresh produce that has been so readily available over the summer will no longer be available, or at least not available and as tasty as it is now.  

Today we managed to make off with some grape tomatoes, a ball of fresh mozzarella, and some ice cream!


Anyway, there's nothing too fancy about this dish here; just a tomato, basil, and mozzarella salad made with the spoils from our trip to the farmers' market this morning.  Despite it's lack of inventiveness, it sure is pretty.  I call it "Chunky Caprese Salad" because I just kind of chunk everything up and throw it in a bowl.  It's the lazy person's version of the classic recipe.


You'll need:


Tomatoes (we went with grape tomatoes since the full sized heirlooms weren't looking so hot today, and have regular red ones and some green guys that I'm not sure what variety they are)
Fresh mozzarella
Fresh basil, torn or chopped
Extra-virgin olive oil, for drizzling
Salt and pepper


Wash and dry your tomatoes.  Slice them in half (or if you're using bigger, full-size tomatoes you can cut them into big slices or wedges... do whatever you'd like!) and place them in a bowl.  


Slice (or dice, or whatever!) your mozzarella and add it to the tomatoes.  Add in the fresh basil.  Toss everything together.  Drizzle everything with the olive oil, and give it a healthy sprinkling of salt and pepper.  Toss again.


Summer in a bowl =)


You can let it hang out in the fridge or a while, or eat it as is.  

Saturday, September 3, 2011

Baked Garlic Cheese Grits


Disclaimer: This ain't good for ya.  But it sure is good.  =)

This recipe marks the first appearance of a truly cheesy dish on this blog!  I'm slightly disappointed that it didn't happen sooner.  I'll try my best to make sure it doesn't take this long for another absurdly cheesy dish to make an appearance.  

Cheese haters need not read any further.

Since college football season just started, and Sean is a big college football fan, I wanted to throw together a little brunch to celebrate the start of the season on this three day weekend (again, ahhh... three day weekends are so sweet).  Also, I just wanted an excuse to make these grits.  Regardless of the reasoning, we'll probably invite a few of the neighbors over for some noms and some football.

Apparently I'm on a Food Network kick, because this recipe comes from Paula Deen, and can be found here.  It really goes without saying since this is a Paula Deen recipe, but this dish ends up being quite rich.  You have been forewarned =)

You'll need:

6 cups chicken broth (I didn't have quite this much on hand, so I used a combo of chicken broth and water.  It works out just fine.)
1 tsp salt
1/4 tsp pepper
1/4 tsp garlic powder
2 cups regular grits
16 oz. shredded sharp cheddar, plus a little extra for topping the dish
1/2 cup milk
4 large eggs, beaten
0 butter - 1 stick of unsalted butter (Paula's original recipe calls for a whole stick, <shocked face>, but I found that it made it a little too rich last time I made it.  I ended up tossing in ~3 tbs.  Do whatever you're comfortable with, though!)

Preheat the oven to 350 degrees Farenheit.  Grease a 4-quart casserole dish.

Bring the broth, salt, pepper, and garlic powder to a boil in a sauce pan.  Stir the grits in and whisk until completely combined.  Reduce the heat to low and simmer until the grits are thick.  Add the shredded cheddar and milk, and stir.  Gradually stir in the beaten eggs and butter until combined.


Please excuse my use of the flash.  My kitchen has no windows, and therefore, terrible lighting =(


Pour the mixture into the prepared casserole dish.  Sprinkle with the leftover cheese and bake for 35-40 minutes, or until set.


Before baking...

Like I said, it's rich, but oh so good.


And after baking.

Mmm... observe the cheesy gooey goodness...