."

Thursday, September 29, 2011

Peanut Butter Chocolate Chip-Peanut Butter Chip Muffins

Oh yes.  You read that correctly.  Peanut butter plus chocolate chips plus peanut butter chips.  All in delicious muffin form.  This recipe comes from The Galley Gourmet.  And as promised, here is the recipe for these tasty muffins.  I swear I'll bring them to work tomorrow.  I was in a rush this morning and sort of forgot.  Sorry!


You'll need: 


2 1/4 cups all purpose flour
2 tsp baking powder
1/2 tsp kosher salt
6 tbs unsalted butter, melted and cooled
2/3 cup light brown sugar, packed
1/2 cup peanut butter (creamy, chunky, or both!)
2 extra large eggs
1/2 cup milk (2% or whole)
1/2 tsp vanilla extract
1/2 cup chocolate chips, heaping
1/2 cup peanut butter chips, heaping


Preheat the oven to 350 degrees F.  Line a muffin tin with 12 paper liners.


Whisk together the flour, baking powder, and salt.  In another bowl, whisk together the butter, brown sugar, peanut butter, eggs, and milk until smooth (mine was looking pretty soupy at this stage, so don't worry if yours does too).  


Mix the wet and dry ingredients until just combined.  Next, fold in the chocolate and peanut butter chips.


Fill the prepared muffin tins all the way to the top.


The Galley Gourmet's recipe says to bake them for 18-20 minutes, but I found that mine needed 22-23 minutes.  At 18 minutes they were pretty raw on the inside.  Bake them until a toothpick or a knife comes out clean.  Cool them in the pan for ~5 minutes, then move them to a wire rack to finish cooling.


If you fill the paper liners up all the way to the top, you'll get 12, nicely domed muffins out of this recipe.  And what can I say?  It's chocolate + peanut butter + muffiny goodness.  They are pretty awesome.  They were great as a post-dinner snack, although I imagine that they would be good at any time of day.

Wednesday, September 28, 2011

Penne with Zucchini, Pesto, and Chicken

Today is already shaping up to be one of those days...  I figured it's time to take a little break, and update my blog.  Preferably with something simple... a post that is largely completed.  Luckily, this Penne with Zucchini, Pesto, and Chicken fit the bill.  I hope you all enjoy this one as much as Sean and I did, especially on this rainy, dreary day (but really I hope that the weather is better wherever you are!).

Adapted ever so slightly from Kalyn's Kitchen.


You'll need:


1 box short cut pasta
salt, for seasoning pasta water
2-3 zucchinis, cut into half moon shapes (2 if medium, 3 if small)
2 cloves garlic, minced
1 tbs olive oil
salt and pepper, for seasoning zucchini
basil pesto, 2/3 cup or to taste
1/2 cup pasta cooking water
2 small chicken breasts, cooked and shredded

Put a pot of salted water on the stove to boil.  While waiting for it to come up to a boil, heat 1 tbs of olive oil in a big pan, add the garlic, and satuee for approximately a minute.  Once the garlic is fragrant, add the zucchini and season with salt and pepper. 

The pasta water should probably be boiling by now so add your pasta to the pot.  When your zucchini is crisp-tender, add the pesto and gently combine.  Once your pasta is done, scoop out ~1/2 cup of the pasta water and set it aside.  Then you can go ahead and drain your pasta and add it to the zucchini on your stove.  Mix everythig up, and add as much reserved pasta water as you need to get the mixture combined nicely. 

I threw some cooked shredded chicken in there, too right at the end.  This dish held up pretty well for 2-3 days in the fridge, but is really best when eaten right after preparing it.  You could add your own twist, too, if you'd like.  I bet it would be good with any kind of pesto, and would probably be pretty great with some grilled shrimp thrown in, too.  Enjoy! =)

Monday, September 26, 2011

Zucchini Parmesan

Recipe from Gimme Some Oven!


So... it's not exactly health food.  It's more like melty cheese with a side of zucchini.  I'm not complaining, though!


You'll need:


2-3 zucchini, ends trimmed, sliced into ~1/3 inch slices
salt and black pepper
1 cup unbleached, all purpose flour
vegetable or canola oil
2/3 cup of your favorite tomato sauce
1 large block or ball of fresh mozzarella (~4.5 oz.)
1 cup Parmesan cheese, grated (~3 oz.)
handful of basil leaves, torn or chopped


Start by preheating your oven to 350 degrees Fahrenheit.  Sprinkle the slices of zucchini with some salt and pepper.


In a bowl, dredge the zucchini in the flour, tapping the slices lightly against the side of the bowl to remove excess flour.  Heat about 1/4 inch of oil in a large skillet over high heat.  Once the oil is heated, place the zucchini slices in the skillet in a single layer.  Turn the heat to medium-high, and cook for approximately 1.5 minutes on each side.  Remove to a plate lined with paper towels to cool.  Repeat in batches until all zucchini is cooked, adding more oil as needed.


In an oven-proof skillet or baking dish, arrange as many zucchini slices as you can in a single layer.  Top each slide with a bit of spaghetti sauce, a slice of mozzarella cheese, and a sprinkling of parmesan cheese.


Bake for 25-30 minutes or until the cheese is melted and has begun to turn a golden brown color.  I turned on the broiler for a few minutes at the end.  


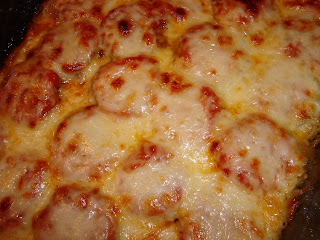
All of the cheese that was previously on top of the zucchini slices melts and morphs into one giant, gooey, mass of cheese.  It's delish.


Remove from the oven and garnish with the basil.  Serve immediately.  


This was a cheesy mess, in the absolute best way possible.  Definitely comfort food!

Sunday, September 25, 2011

Matt's Birthday Weekend -- A Recap

This weekend was filled with many good things:

Great friends...

boozy girly drinks...


very snuggly puppies...


delicious food... 

and of course, happy birthday wishes.
Don't be surprised if you see that breakfast casserole on my blog sometime in the future.  It was good!


My only complaint is that the weekend went by too quickly--they always do.  It's weekends like this that force me to remember just how much I miss living in the Pittsburgh area, and being able to see our friends from home just about any time we'd like.  We make do, though =).  


One final "Happy birthday weekend!" to Matt, and a big thank you to him and Adrienne for having us for the weekend.  We love you, and as always, we had so much fun, and can't wait to do it again.

Friday, September 23, 2011

Pumpkin Spiced Oatmeal Pecan Cookies

So I know I declared Autumn officially here like a week ago... but today it really is official!  Happy first day of Autumn, everyone!

Also, hoo-freaking-ray for the weekend being here!  Sean and I are heading back to PA this evening to stay with our friends, Adrienne and Matt.   They're our best friends, so it goes without saying that we always have a blast when with them.  I love visiting them/having them come visit us, but after everything that's been going on lately, I could really use a weekend to just chill out and have fun.  


To top it off, it's Matt's birthday today!  I know you don't read my blog, but happy birthday, Matt!  In honor of his birthday, I did a little baking.  When we get there this evening he'll be presented with a cookie brownie:


The cookie brownie is sort of a birthday tradition among our group.  It was from a boxed mix, so it isn't all that exciting... but it's still good!


and some Pumpkin Spiced Oatmeal Pecan Cookies.


Whew!  Now that's a mouthful!  I found the recipe for these little beauties over at the blog SkinnyTaste.  


You'll need:


1 cup all purpose flour
2 cups quick cooking oats
1 tsp baking powder
1/2 tsp baking soda
1/2 tsp salt
1/2 tsp ground cinnamon
2 tsp pumpkin pie spice*
2 tbs unsalted butter, room temperature
1/2 cup granulated sugar
1/2 cup brown sugar, unpacked
1 large egg
6 tbs canned pumpkin puree (NOT pumpkin pie filling)
2 tsp vanilla extract
3/4 cup pecans, chopped


*if you don't have pumpkin pie spice, check out this home made recipe here at Smells-Like-Home.

Preheat your oven to 350 degrees F and line 2 baking sheets with parchment paper (or a Silpat, if you have one).

In a medium bowl, whisk together the flour, oats, baking powder, baking soda, salt, pumpkin pie spice, and cinnamon.  In a separate bowl, with a mixer, cream together the butter and sugars on medium speed.

Add the egg, followd by the pumpkin and vanilla extract.  Stir in the flour and oat mixture until just combined.  Stir in the pecans.


Look at that whole grain goodness

Drop 1 tbs of dough at a time onto the prepared cookie sheets.  Bake for 10-12 minutes, or until the cookies become lightly browned at the edges.  Cool on the cookie sheet for 3-4 minutes, then remove to a wire rack to complete cooling.

This recipe should make ~32 1 tbs-sized cookies.

When first looking at the dough in my mixing bowl, I thought "now there is no way I'm getting 32 cookies out of this...".  Sure enough, I got 31! 


These cookies are nice and chewy, and not too sweet.  They're a nice healthy-ish alternative to the other pumpkin cookies that I baked recently (although those aren't terrible for you, either!). 

Thursday, September 22, 2011

Mediterranean Chopped Salad

Adapted ever-so-slightly from The Curvy Carrot.

A post like this is long overdue.  We had one hell of a summer, and I comfort ate the whole way through.  Between taking my written comps, waiting like 2 months to get the results (seriously frustrating), our wedding, finishing my NRSA, and Maeby's surgery and associated health issues, I have been eating my feelings a lot.  No harm, no foul, right?  Yeah, except I only have one pair of jeans that I can comfortably sit down in while zipped up.  That's pretty embarassing, and a definite wake up call.  I'd rather make the effort to eat better and lose a bit of weight than go out and buy new clothes.  I'm too poor to buy new clothes (grad student with a sick puppy, remember?).  


That's where this recipe comes in.  It's one of my all time favorite salads.  I have a serious thing for Greek-style salads.  Actually, I have a thing for anything with Kalamata olives and feta cheese.  It has sweet , crunchy, and tangy elements, and is super healthy.  

You'll need:


1 medium cucumber, peeled, halved lengthwise and cut into medium dice (~1 1/4 cups)
1 pint grape or cherry tomatoes, halved or quartered depending upon size (~1 1/2 cups)
3 tbs extra virgin olive oil
3 tbs red wine vinegar
1 medium garlic clove, minced
1 can chick peas (14 oz.)
1/2 cup kalamata olives, pitted and chopped (Even if the jar says they're pitted, don't believe them.  I found 4 pits in the half of a jar that I used.  Tsk tsk...)
1/2 small red onion, minced (~1/4 cup)
1/2 cup fresh parsley, chopped
~3 cups of your favorite lettuce (baby spinach and arugula is very tasty!)
4 oz. feta cheese, crumbled (~1 cup)
black pepper
salt


Combine the tomatoes, cucumber, and 1 tsp of salt in a colander/strainer and set over a bowl. Let it stand for 15 minutes or so.  Make sure not to skip this step.  I did because I was in a hurry the morning I made the salad.  The flavor wasn't affected, but everything got quite soggy.


Whisk the olive oil, red wine vinegar, and garlic together in a large bowl.  Add the drained cucumber, tomatoes, chickpeas, olives, onion, and parsley.  Toss it all up and let it sit for a few minutes.


Add the lettuce and feta.  Toss to combine.  Season with a little salt and pepper and serve!


Sorry it's not the greatest photo.  I was in a hurry to leave for class the morning I made it.  But trust me, it is a really, really good salad!


It's supposed to serve 4-6, but I usually manage to eat it in about 3 servings.  It's that good!  If you're looking for a little something on the lighter side, but that won't leave your stomach rumbling a couple of hours later, this could be for you.  It would probably be good with some grilled chicken or shrimp, or even some tuna, too.  Enjoy!!  

Tuesday, September 20, 2011

Pumpkin Risotto

As promised, I have another pumpkin recipe for you!  This one came about as a result of my desire to use up the rest of a can of pumpkin left over after making my Pumpkin Chocolate Chip Cookies a few days ago.  


I love risotto, and figured that might be a good way to use up some pumpkin.  Since learning to make risotto is really more about learning a method, rather than any individual recipe, this particular recipe came about as a result of my prior experiences with risotto, and a little luck of course!  Because of this, I don't really have any recipe to link back to for this one.  


I know that making risotto can seem pretty daunting.  Fear not.  It's not really all that difficult... just sort of labor intensive.


You'll need:


2 tbs olive oil
2 tbs butter
1 1/2 cups arborio rice
5 cups chicken or vegetable broth (ideally you'd use 1 cup dry white wine and 4 cups broth, but I didn't have any wine)
1 29 oz. can, minus 1 cup pumpkin puree (NOT pumpkin pie filling; try Libby's)
1/2 tsp ground cumin
1/4 tsp ground nutmeg
1 medium white onion, chopped (or 2-3 shallots, chopped)
2 cloves garlic, minced
1/2 cup Parmesan cheese, grated
salt and pepper to taste


Heat your broth (or combination of broth and wine) in a pot over medium heat.


In another (large) pot, heat olive oil and butter over medium heat until butter is melted.  Add onion and garlic to the pot, stirring occasionally until onions are translucent.  Add the cumin and nutmeg to the pot, stir to distribute throughout the onions, garlic, butter, and oil.


Add the arborio rice to the pot.  Stir the rice around until every grain is coated in the butter and oil.  Stir frequently, and allow the rice to toast a bit, just until it begins to smell nutty.


Next comes the labor intensive portion of the recipe.  Add a couple of ladles of broth to the rice.  Begin stirring, almost constantly.  You probably shouldn't walk away from your stove after this point.  It's pretty easy for everything to burn on the bottom if you don't stir it often enough.  Once the rice has absorbed the liquid, add in another couple of ladles of broth.  Resume stirring.  Continue to add more liquid and stir until all of the liquid has been absorbed into the rice.  It should be nice and creamy.


At this point you can add your cheese and pumpkin puree to the rice.  Stir it all around until everything is well-combined.  Make sure to taste it, then add some salt and pepper as you see fit.


This was probably the best risotto I've ever made.  It was perfectly creamy.  It had a nice cheesiness to it, but you could definitely still taste the pumpkin.  Feel free to add more or less pumpkin, depending upon your level of infatuation with the stuff.  Next time around I may try adding 1/2 tsp or so of chili powder, too.  Some more smokiness and some heat might be nice.  


If you need to use up some pumpkin,  or if you just happen to love the stuff, I'd really recommend you give this a shot!  

Monday, September 19, 2011

Oatmeal Scones with Cinnamon Sugar

Thanks to Good Housekeeping for this one!


I really love scones, and have been looking for a healthy-ish recipe for a while.  My parents visited this weekend, and I wanted to have something for breakfast that wouldn't require much effort on my part the morning of, so I could spend more time hanging with them (and my childhood dog, Sophie!) instead of being in the kitchen.


I typically make a breakfast casserole (recipe forthcoming!), but wanted to change things up a bit.


You'll need:


2 cups old-fashioned oats
2 cups all-purpose flour
1/2 cup brown sugar
2 1/2 tsp baking powder
1/2 tsp baking soda
1/2 tsp salt
1/4 tsp ground nutmeg
1/2 cup (1 stick) butter, cut up
3/4 cups buttermilk
1 large egg
cinnamon and sugar


Begin by preheating your oven to 425 degrees F.  In a food processor, combine the oats, flour, sugar, baking soda, baking powder, salt, and nutmeg.  Pulse to blend.  Add the cut up butter and pulse until coarse crumbs form.


In a cup, beat the buttermilk and egg.  With the food processor running, add the egg mixture and pulse until a dough forms.  The dough is pretty sticky, so make sure to use some flour on your palms and 1/4 cup measuring cup when handling the dough.


Scoop the dough, by the 1/4 cup, onto a cookie sheet.  Flatten each mound into a 2 1/2-inch round.  Sprinkle the tops with cinnamon and sugar.  Bake 15-17 minutes or until golden on the bottom.  I baked mine for 16 minutes, but found that some were a wee bit overdone on the bottom.  Just make sure to keep an eye on them toward the end.


I managed to get 9 scones out of this recipe.


Sophie, intently staring the scone down.


They're a bit crumbly, and aren't nearly as dense as regular scones, but also aren't overly sweet, which is nice.  The top is crusty and crunchy from the cinnamon and sugar.  All in all, these ended up being pretty tasty, and I don't feel terrible about eating them since there isn't a ton of sugar in them, and they have some oats.  Enjoy!

Saturday, September 17, 2011

Pumpkin Chocolate Chip Cookies

I've decided that it's official: Fall is here.  The high temperature yesterday was only in the 60s!  And this weekend it's only supposed to get up to about 70, and should be partly sunny.  I am absolutely loving it.  Bring on the cooler, non-humid weather, beautiful leaves, and sweaters.  


Since fall is here, it's time to start cooking and baking with pumpkin!  Admittedly, I've never been a humongous fan of pumpkin, but I've seen so many recipes on other blogs that use pumpkin, and they all look so delicious.  I figured it couldn't hurt to give pumpkin another try.  


My parents (Who I now know are regular readers of my blog; Hi Mom and Dad!!) are visiting this weekend.  I usually like to bake a little something for my guests anyway, so these Pumpkin Chocolate Chip Cookies seemed like a natural choice.  


After doing a little perusing of the interwebz, I came across this recipe at My Baking Addiction.


You'll need:


1 cup canned pumpkin (NOT pumpkin pie filling)
1 cup granulated sugar
1/2 cup vegetable oil
1 egg
2 cups all-purpose flour
2 tsp baking powder
2 tsp ground cinnamon
1/2 tsp salt
1 tsp baking soda
1 tsp milk
1 tbs vanilla extract
2 cups semi-sweet chocolate chips


Preheat the oven to 350 degrees F.  Combine your pumpkin, sugar, vegetable oil, and egg.  In a separate bowl, stir together the flour, baking powder, cinnamon and salt.


Dissolve the baking soda with the milk and stir into the flour mixture.  Add the flour mixture to the to the pumpkin mixture and mix well.  Add in the vanilla and chocolate chips.


Drop by the spoonful onto greased cookie sheets and bake for approximately 10 minutes, or until lightly browned and firm.


The verdict: My first foray into baking with pumpkin was a success!  The cookies were really light, and almost fluffy, and the chocolate and pumpkin flavors worked together really well.  You can definitely expect more pumpkin recipes from me in the future!

Thursday, September 15, 2011

Teriyaki Chicken

The weather in Bmore is finally starting to cool down and feel more like Fall.  Walking home after school, I even felt a little chilly as the damp breeze blew!  I am definitely not complaining about this.  Autumn weather is most definitely a welcome change from the boiling hot, surprisingly humid summers that we have here.  I'm really starting to look forward to doing some more baking, and cooking with seasonal Autumn ingredients.  After a trip to the grocery store tomorrow morning I should be able to do just that =).  Anyway, on to the latest post!


Recipe originally found at A Sweet Pea Chef.  And just like Lacey said, this teriyaki sauce is a-freaking-making.  I'll definitely be making the sauce all the time from now on!  It's waaaay better than any store bought teriyaki sauce.  Trust me.  Or make it yourself if you don't believe me!


You'll need:


Teriyaki Sauce
1/3 cup soy sauce
2 tbs honey
1 tbs brown sugar
2 cloves garlic, minced
1 tsp fresh ginger, minced (I didn't have any ginger on hand, so I omitted it)
1 tsp apple cider vinegar
1/3 cup water
1 tbs cornstarch


Chicken
1 tsp olive oil
Boneless skinless chicken breasts (Original recipe calls for 4, but I only used 2)
Kosher salt
Black pepper
Optional garnish(es): sliced scallions or sesame seeds


Preheat your oven to 425 degrees Fahrenheit.


To make the sauce, combine the soy sauce, honey, brown sugar, garlic, ginger (if you have any, unlike me), and vinegar over medium heat in a small saucepan.  Stir frequently.


Dissolve the cornstarch in water in a small bowl and add to the saucepan.  Cook for 6-8 minutes until thickened, stirring frequently.


To make the chicken, heat the olive oil in a large, oven safe skillet or pan over high heat.  Season the chicken breasts with salt and pepper.

Place the chicken in the heated skillet and cook on one side until golden-brown (~5-6 minutes).  Flip the chicken over, pour the teriyaki sauce over and in between the chicken and slide the skillet into the oven.


Bake the chicken for 15-20 minutes, or until the chicken is cooked through.


Drizzle the chicken with the teriyaki sauce left in the skillet.  Serve with steamed rice (I went with brown rice) and garnish with scallions and/or sesame seeds if you'd like.


Next time (and there will definitely be a next time) I think I'll steam up some veggies to go alongside the chicken.  Other than that, I wouldn't change a thing!

Wednesday, September 14, 2011

Sour Cream and Roasted Red Pepper Dip

Believe it or not, this is adapted slightly from a Weight Watchers recipe!  You'd never know it, though.  


I made this as part of the Welcome Home/Football Party that we had over the weekend.  I felt sort of obligated to prepare some lighter fare, since most of the other food was pretty heavy, and because I currently only have one pair of jeans that I can comfortably sit down in. <hangs head in embarrassment>


Maeby perched in my (clean) laundry basket, supervising everything going on in the kitchen.


You'll need:


15 oz. jar roasted red peppers, drained (approximately 2 cups)
1 cup reduced fat sour cream
1/2 cup basil, fresh
1/4 cup flat leaf parsley, fresh
1/2 tsp garlic powder
1/2 tsp salt, or to taste
1/4 tsp black pepper or to taste


Place all of your ingredients in a food processor, mini chopper, or blender.  Let 'er rip, and puree until smooth.  


Make sure to taste it after pureeing.  I almost always feel like this needs more salt.


It ends up being a light pink color.


This dip is really good with some fresh veggies, pita wedges, crackers, and on and on.  It's a nice, light alternative to the usual sour cream and onion dip that often gets served at tailgating parties.


Tuesday, September 13, 2011

Homemade Funfetti Cupcakes

I am so disappointed.  Initially I intended to make these cupcakes "Pittsburgh Style" for the football party we had over the weekend.  Pittsburgh Style isn't anything fancy; I just thought it would be cute to dye the frosting gold (or yellow, for the non-Yinzers out there), and use only black, gold, and white sprinkles.  But neither Walmart (a.k.a. the 7th circle of Hell) nor Safeway had a very good selection of sprinkles.  Oh well.  They're still super cute!  Next time I make them, I'll put in a little extra effort and head to Michael's and hope that they have a better assortment, and larger tubs of sprinkles.


The cupcake recipe originally comes from Simply Scratch, and the frosting can be found at Best Cupcake Recipes.


You'll need:


Cupcakes (makes 24)
4 whole egg whites
1 cup whole milk
2 tsp vanilla extract
3 cups cake flour, sifted
1 1/2 cups granulated sugar, sifted
1 tbs plus 1 tsp baking powder
1/4 tsp Kosher salt
1 1/2 sticks unsalted butter, softened
1/2 cup sprinkles plus more for garnish


Vanilla Buttercream Frosting (enough for ~24 cupcakes)
2 sticks unsalted butter, at room temperature
6-8 cups powdered sugar (I only needed 7 cups)
1/2 cup milk
1.5 tsp vanilla extract
Food coloring, yellow


To make the cupcakes, begin by preheating your oven to 350 degrees Fahrenheit.  Line your cupcake pan with paper liners.


Combine the egg whites, vanilla, and whole milk in a bowl.  Whisk together and set aside.


In a large mixing bowl (preferably the bowl on your stand mixer), sift the dry ingredients.  Fitted with a paddle attachment, blend the dry ingredients with the butter and half of the egg and milk mixture.  Scrape the sides and bottom of the mixing bowl and then slowly add the remaining mixture.  Stop mixing once everything is combined.


Fold in the sprinkles and fill the paper liners halfway.  Bake for 17-20 minutes, but keep an eye on them so as not to over bake.


To begin making the frosting, you'll either need to wash the bowl and paddle attachment on your stand mixer, or break out your electric hand mixer and another bowl.  


In either the stand mixer or with your electric hand mixer (or by hand!), mix the butter until smooth and creamy.


Add 4 cups of powdered sugar, the milk, and vanilla on low speed until combined.


Yep, that's 8 cups of powdered sugar right there.


Add 2 more cups of powdered sugar and on low speed mix until light and fluffy.  If necessary, add the remaining 2 cups of powdered sugar.


Now that you've made your cupcakes and buttercream frosting, you can decorate your cupcakes!  It would be perfectly fine (and certainly delicious) to leave your buttercream as is, but I'm opting to jazz mine up a bit.  I took mine and added some yellow food coloring until achieving this rich gold color.


Now it's time to frost these bad boys!  I'd advise acting fairly quickly, since the buttercream can stiffen up on you in no time.  Frost 'em and add some more sprinkles and you're done!


How cute!  Thank you to my husband for serving as a hand model =)


Please check out Best Cupcake Recipes for tips on how to care for your buttercream, and for different variations.


*Post-baking notes: This frosting is SUPER sweet.  I know, I know... what did I expect?  It has like 7 cups of powdered sugar in it.  Just wanted to warn ya ;). 

Monday, September 12, 2011

Jalapeno Popper Dip

Recipe originally appearing on the nomlicious Brown Eyed Baker.


You'll need:


16 oz. cream cheese, at room temperature
1 cup mayonnaise
8 pieces bacon, cooked and chopped up
6 jalapenos, minced (or use a 4 oz. can of jalapenos, diced)
2 cloves garlic, minced
1/2 tsp cumin
1 1/2 cups shredded cheddar cheese


Topping:
1 cup panko breadcrumbs
1 cup grated Parmesan cheese
4 tbs unsalted butter, melted


Begin by preheating your oven to 375 degrees Fahrenheit.


Combine the cream cheese, mayo, bacon, jalapenos, garlic, cumin, and cheddar cheese in a mixing bowl.  Pour the mixture into a casserole dish or a 9x13 baking dish.


Combine the panko breadcrumbs, Parmesan cheese, and melted butter in a small bowl, tossing with a fork until the mixture is evenly moistened.  Sprinkle on top of the cream cheese mixture.


Bake in the preheated oven for 25-30 minutes, until the top is golden brown and the dip is bubbly.  Let it rest for 5 minutes before serving.  Serve with tortilla chips, crackers, veggies, etc.


One bit of this dip elicited an "Oh my God, is is this good!" from my husband.  I'd say it's a keeper!  It's cheesy, with a slight kick from the jalapenos.  Perfect for tailgating or football parties!

Sunday, September 11, 2011

Welcome Home/Football Party

Sean started a new job about a year ago.  As luck would have it, one of his co-workers, Melissa, lives right down the hall from us with her fiance, Kevin.  They're both really nice people, and it's been great getting to know them.


Shortly after we met Kevin, he was sent overseas for work reasons and has been gone since the end of May.  Thankfully, he was able to come home this weekend!  Melissa decided to have a welcome home bash for him this weekend (that somehow ended up being held in our apartment... =P).  It just so happens that the date she chose coincides with the Steelers vs. Ravens football game.   


I'm no football fan, but I understand the significance of the Steelers/Ravens rivalry.  Whenever I meet a native Baltimorean for the first time, and they find out that I'm from Pittsburgh, their first question is "You're not a Steelers fan, are you?!?".  The ask this with obvious disgust and audible trepidation in their voices.  Their fears are allayed when I assure them that I don't watch much football.  I know, I know... I'm like the only Pittsburgher who doesn't worship the Steelers.


Anyway, I'll take every chance I get to do some entertaining.  I'll be making the following blog-worthy noms:


Homemade Funfetti Cupcakes
Jalapeno Popper Dip
Roasted Red Pepper Dip
and, of course, my pasta salad


Look for these recipes this week, starting tomorrow!