."

Monday, October 31, 2011

Happy Halloween!

Happy Halloween, everyone!


We had a little Halloween party over the weekend, and I wanted to share recipes for some of the goodies that I made.  In the coming week, you'll see recipes for some pumpkin peanut butter dip, pumpkin cupcakes with cream cheese frosting, black bean dip, and you've already seen the Halloween Rice Krispie Treats I made.  


I just wanted to share a few photos with you, as well, to give you a little preview of what's to come this week!


Made by Megan, Anthony, and Julia!  Yum!

Check out Maeby in her costume, too!!  


World's cutest and least threatening shark.
The poor little girl HATED it.  Because of that, we only kept it on her for about 5 minutes to take some pictures, then we let her run free.  When Sean put it on her, she wouldn't move.  She just stood there, very stiff-legged, with a look on her face that said "I'll get you for this".


Have some fun today and look for more recipes from me as the week goes on!

Sunday, October 30, 2011

Halloween Rice Krispie Treats

So Sean and I had a little Halloween party over the weekend, and since I've somehow managed to not post any Halloween-related recipes, I thought I'd share one with you that I served at the party.  It's your basic Rice Krispie treat, but jazzed up for Halloween.  I hope you enjoy them!


This recipe was originally found at Pass the Plate.  


You'll need:


3 tbs butter
4 cups mini marshmallows
1/2 cup peanut butter
6 cups puffed rice cereal 
12 oz. bag of candy corn


In a large saucepan, melt the butter over low heat.  Add the marshmallows and stir until completely melted.  Stir in the peanut butter until it has melted, too.  This is kind of a sticky mess... so be prepared!  Remove from the heat and stir in the cereal and candy corn until everything is well coated.  Use a buttered spatula or piece of wax paper to evenly press the mixture into a well-greased 13x9x2-inch pan.  Let them firm up, cut into desired shapes/sizes, and enjoy!


If your store happens to be out of regular candy corn (coughWalmartcough...) go right ahead and use some of the other varieties.  I used some (somewhat racially insensitive...) Indian Corn, because I was a little wary of the caramel-flavored candy corn.  By the way, when did they even come out with the flavored candy corns?  I completely missed out on that one.


Enjoy these!

Monday, October 24, 2011

Sunday Farmer's Market

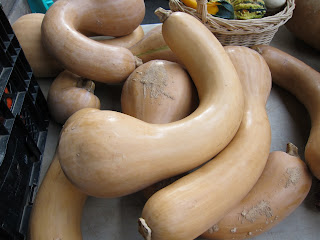
No recipe here, unfortunately.  But I just wanted to share with you some photos I took at the farmer's market yesterday morning (the one held under the JFX downtown).  In keeping with the season, there were lots of apples, pumpkins, all manner of gourds and squashes, as well as some really interesting cauliflower, and other odds and ends.  I was so excited to see all of the autumnal produce.


In the end, I managed to make off with a small pumpkin, 3 bumpy-looking gourds, some apple cider, and a crepe.  Not a bad morning =).  The cider and crepe were delicious, and the pumpkin and gourds will help to decorate our apartment during the Halloween party we're throwing this weekend.  Be sure to check back later this week and the beginning of next for recipes from the party!

Sunday, October 23, 2011

Applesauce Spice Cake with Vanilla Buttercream Frosting

My parents came to visit us this weekend.  Okay, I should be honest with you.  I'll start again.  My parents came to visit Maeby this weekend.  She's their only grandchild (read: granddog) at the moment, and they just love her.  The feeling is mutual, I can assure you.  My mom has threatened on many occasions to kidnap her.  She likes to laugh it off and pretend that she's kidding, but we all know that she's at least half-serious about it.  You have to keep an eye on her to make sure that she doesn't try and smuggle Maeby out under a coat or something.


My dad's birthday happens to occur this weekend as well.  I wanted to bake him a birthday cake, preferably without having to resort to using a boxed mix.  Mostly because I didn't have a boxed mix handy and didn't feel like heading back to the store.  Also, because I thought it might be nice to bake a cake that was at least moderately seasonally-appropriate.  Enter: the Applesauce Spice Cake.


The recipe for the cake was originally found at Baking with Basil, and the frosting recipe was found at Savory Sweet Life

For the cake, you'll need:


2 1/2 cups all-purpose flour
1 1/4 cups granulated sugar
1/4 tsp salt
1/2 tsp baking powder
1 1/2 tsp baking soda
1 tsp cinnamon
1/2 tsp allspice
1/4 tsp nutmeg
1 stick butter, room temperature
1/2 cup buttermilk
1 tsp vanilla extract
1 1/2 cups unsweetened applesauce
2 eggs, room temperature


For the frosting, you'll need:


2 sticks unsalted butter, room temperature
3-4 cups powdered sugar
1/4 tsp salt
1 tbs vanilla extract
up to 4 tbs milk or heavy cream


Preheat your oven to 350 degrees F.  Grease your 9x13 cake pan with butter or non-stick cooking spray.


In a large bowl, combine the flour, sugar, baking soda, baking powder, salt, and spices.  Whisk until combined.  Add the butter, buttermilk, and applesauce to the dry ingredients.  Beat until well combined.  Beat in the eggs, one at a time.


Pour into cake pan and bake for 20-30 minutes, depending upon your particular oven.  Mine only took about 22 minutes, so make sure to start checking at 20 minutes.  You can also use this recipe to make cupcakes!  If you choose to go that route, fill the cupcake liners 3/4 of the way full and bake for 16-19 minutes.


The cake after baking, complete with the hole in the center where I tested for doneness.
To make the frosting, you'll want to beat the butter with a mixer outfitted with a paddle attachment on medium speed for just a few minutes.  Add 3 cups of powdered sugar (you can always add the 4th cup later on if you think you need it) and beat on the lowest speed, that way the powdered sugar doesn't go flying everywhere.  Beat this until the sugar has been well incorporated into the butter.  Increase the mixer's speed to medium and add the vanilla, salt, and 2 tbs of milk. 


If the frosting looks a little too stiff for your liking, you can add the extra milk 1 tbs at a time.  If it ends up being too runny, you can add some more of the sugar to stiffen it up.


A beautiful buttercream!  This is my favorite recipe to date.  It isn't so sweet that your teeth hurt while eating it.
Now frost your cake and/or cupcakes! 


All frosted up!

After slicing into it.  Mm mmm...
This cake smells wonderful while baking.  It smells just like fall.  It's sweet and spicy, and really moist.  Next time I think I'll bake it into cupcake form =).

Happy birthday, Dad!!

    Thursday, October 20, 2011

    Spaghetti Squash with Garlic Butter

    Recipe originally found at Steamy Kitchen.

    You'll need:

    1 spaghetti squash
    2 tbs butter
    2 cloves garlic
    1/4 cup finely minced fresh herbs (optional)
    1/2 tsp salt (or to taste)
    1/4 cup shredded parmesan cheese

    Preheat your oven to 375 degrees F.  Place your spaghetti squash on a baking sheet and bake for ~1 hour (mine took 1 hour and 10 minutes).  You'll know it's done when you can easily pierce the skin with a sharp knife with little resistance.  Set the squash aside to cool for 10 minutes or so.

    Cut the squash in half, lenghtwise.  Use a fork or spoon to remove the seeds and other membranes.  Discard them.  Continue using your fork to scrape the squash to get long strands that resemble spaghetti noodles.  If your squash is proving difficult to scrape out, put it back in the oven for 10 minutes or so.

    Look at those squashy strands!
    Heat a large sautee pan and melt the butter.  Add the garlic and sautee over medium-low heat for a minute or so.  Once the garlic is fragrant, add your strands of spaghetti squash, salt, and herbs if you're using them.  Add the cheese, and then taste to make sure you don't need more salt.

    You can cook for a couple minutes more, or just eat it as is, depending upon your preference for the texture.  Cooking it for a bit longer will obviously make it a bit softer.  It has a bit of a crunch to it to begin with.


    Using some fresh herbs would have made it a lot prettier by adding a nice pop of color, and would certainly have imparted some more flavor.  Unfortunately, my herbs bit the dust this past week.  The parsley and chives wilted and couldn't be revived, and the basil started turning brown.  Can I get a moment of silence?  This is a very sad thing indeed.  Oddly enough, my cherry tomato plant is still thriving!  I've gotten more cherry tomatoes off of it in the past few weeks (I wish I had taken pictures.  I had TONS!) than I got pretty much all summer.

    This made for a nice, relatively low calorie, albeit interesting side dish.  Since it was just Sean and myself eating dinner, I only ended up using half of the squash.  Those things actually have a lot inside of them!  But you can obviously use as much squash as you need/want to.  Now I just need to figure out how I'm going to use up the other half...

    Tuesday, October 18, 2011

    Banana Peanut Butter Muffins with Chocolate Chips

    I decided to seek out a recipe for a banana-based baked good in response to pleas from my family that I stop posting about pumpkin.  I'll appease them... for now.

    This recipe was adapted from the one found here.

    You'll need:

    1/2 cup plus 2 tbs all purpose flour
    1/2 cup whole wheat flour
    1 tsp baking powder
    1/2 tsp baking soda
    1/4 tsp salt
    2 ripe bananas, mashed
    6 tbs peanut butter (creamy or chunky will do)
    1/2 cup brown sugar
    2 tbs honey
    1 1/2 tsp vanilla extract
    1 large egg
    3/4 cup chocolate chips


    Preheat the oven to 375 degrees F.  Prepare your muffin tin by greasing the cups or inserting muffin liners.


    Stir the flours, baking powder, baking soda, and salt together in a medium bowl.  Set aside.


    Mash the banana, peanut butter (I used chunky, because I love me some chunky peanut butter), brown sugar, honey, vanilla, and egg together in another bowl.  


    Pour the wet mixture into the dry and stir until just combined.  Add your chocolate chips and stir to combine again.


    Fill the muffin tins ~3/4 of the way full.  Bake 20-22 minutes, or until golden brown and a toothpick comes out clean.


    I got 10 muffins out of this recipe.


    C'mon now, peanut butter and banana?  And then you add in some chocolate?  These are great.  The outside is a little crisp, and the inside is moist and chewy, just the way a muffin should be.  

    If you wanted to get those nice, bakery-style domes on top of the muffins you could fill the muffin liners up to the brim.  But then you'd have fewer muffins.  It's your call.  You could always double the recipe if you wanted to have plentiful and tall muffins ;).  Enjoy!

    Thursday, October 13, 2011

    Pumpkin Chocolate Chip Scones

    When I spied this recipe on Foodgawker, I nearly cried tears of joy.  Okay, not really.  That's a little excessive.  But I really was mega-excited about it.  Pumpkin in scone form?  Why didn't I think of this before?  And then add in some chocolate and nuts?  Don't mind if I do!  


    A big "thank you" to Jo Cooks for this one!  I've adapted the recipe ever so slightly.


    You'll need:


    2 3/4 cups all purpose flour
    1/3 cup sugar
    1 tbs baking powder
    3/4 tsp salt
    3/4 tsp ground cinnamon
    1/4 tsp ground ginger
    1/4 tsp nutmeg
    1/4 tsp ground allspice
    1/2 cup (8 tbs; 1 stick) cold butter, cut in cubes
    1 cup chocolate chips
    1 cup combination of pecans and walnuts, chopped
    2/3 cup canned pumpkin puree (NOT pumpkin pie filling)
    2 large eggs
    milk for brushing tops of scones
    sugar for sprinkling on top of scones


    In a large bowl, mix all of the dry ingredients together, including the sugar and spices (but not the sugar used for sprinkling, obviously).  


    Add the cubed butter, and using a pastry cutter (or two knives, or a food processor if you don't have a pastry cutter), cut the butter until it resembles small peas.  


    Add the pecans and chocolate chips to the butter/dry ingredient mixture and lightly mix.


    In another bowl, mix the pumpkin puree and egg.  Add the pumpkin and egg to the dry ingredients.  Use a spatula to mix everything together.


    Form the dough into 1 big disc, or 2 smaller discs (either way they should be ~3/4 inch in thickness).  If you made 1 big disc, go ahead and cut it into 8 triangles, just as if you were slicing a pizza.  If you made 2 smaller discs, slice into 6 triangles a piece, in the same pizza-cutting fashion.


    Preheat the oven to 425 degrees F.


    Lay your scones on a cookie sheet covered in parchment paper (or a Silpat, if you have one).  Place the tray in the freezer for approximately 30 minutes, so the scones can set.


    After the 30 minutes is up, remove from the freezer, brush the tops with a little milk, and sprinkle with some sugar.  Bake the scones for 20-25, or until you can insert a toothpick or sharp knife and it comes out clean.  


    Yum!  These were so good.  Sean and a friend helped me eat these, which was a good thing.  Otherwise I would have polished them all off myself in about 2 days.  Enjoy!!

    Tuesday, October 11, 2011

    Chicken with Creamy Dijon Herb Sauce

    I came across this recipe while clipping coupons one Saturday morning.  It was next to a coupon for, what else, French's mustard.


    You'll need:


    1/2 cup chicken broth
    6 tbs Dijon mustard
    1/3 cup cream cheese, softened
    1 tbs minced herbs, fresh
    1 tbs oil
    4 boneless skinless chicken breasts
    1 tsp minced garlic


    Mix your broth, cream cheese, herbs, and garlic until well blended.  Set aside.


    Cook the chicken in hot oil in an nonstick skillet until it's browned on both sides, but not totally cooked through.  I like to stick mine in the oven to finish cooking from this point on.


    As the chicken is just finishing cooking in the oven, put the broth and cream cheese mixture in the same skillet used to cook the chicken.  Heat the mixture until warm and creamy.  Put the chicken back in the pan and spoon the herby sauce over the chicken.  Dig in!

    You can also bake this chicken the entire way through, or just cook it on the stove top until it's entirely done.  


    Maybe not the most appetizing picture (darn you, poor lighting!), but definitely good chicken.
    You can use any combination of fresh herbs that you like.  I use a combo of basil, parsley, and chives, because that's what I have growing on my balcony.  You can also fudge the amounts given in the recipe until you get something that you like.  I don't usually measure everything out, and it still turns out really well.

    If you happen to pair this with a baked potato, or some mashed potatoes, this sauce is really good on top of those, too!.  Just throwing that out there =).  

    Monday, October 10, 2011

    Baked Chocolate Doughnuts

    So... yeah.  I know I defiantly stated that I'd be making pumpkin doughnuts this weekend, Sean's opinion be damned!  Just forget all about that.  I instead opted for some chocolate doughnuts that we would both enjoy equally.  There's plenty of time for pumpkin doughnuts, anyway =).


    This recipe was found at Handle the Heat, and originally came from Lara Ferroni.  


    I doubled the recipe listed at Handle the Heat, so keep that mind.  The doubled recipe is as follows, and yielded approximately 18 doughnuts.


    You'll need:


    Doughnuts
    2 cups all purpose flour
    4 tbs natural cocoa powder
    2 tsp baking powder
    1/2 tsp baking soda
    2/3 cup granulated sugar
    1 tsp nutmeg
    1 tsp salt
    4 tbs butter
    1/2 cup buttermilk
    1/4 cup plain yogurt or sour cream
    2 tsp vanilla extract
    2 eggs
    glaze or frosting (optional; see below)
    sprinkles (optional)


    Frosting (if you can call it that)
    2-3 oz. chocolate chips/peanut butter chips/some combination of the two
    1 tsp vegetable oil


    Preheat the oven to 350 degrees F.  Grease your doughnut pan (or a muffin pan would do here in a pinch if you don't have a doughnut pan).


    In a large bowl, sift together the flour, cocoa powder, baking powder, and baking soda.  Whisk in the sugar, nutmeg, and salt.  


    Add the butter.  Using your fingers, rub it into the dry ingredients until it becomes coarse crumbs.  In an effort to avoid having to handle butter with my bare hands (something about it makes my skin crawl a bit), I tried using my food processor to "cut" the butter into the flour mixture, and it actually didn't work out so well.  I ended up needing to just get my hands dirty anyway, so just dig on in.


    In a separate medium-sized bowl, whisk together the buttermilk, sour cream/yogurt, vanilla, and eggs.  Add it to the flour mixture and stir until just combined.  Resist the urge to overmix, lest your doughnuts end up being rubbery!


    Now it's time to fill your doughnut pan.  You have a couple of options at this point.  1) Fill a ziploc bag with the batter, cut one corner off of the bag, and pipe the batter into each cup; 2) Use a spoon to fill the doughnut cups with batter.  Either way, make sure to only fill them 1/2-3/4 of the way full.  Any more than that and the doughnuts will puff up so much that you don't have a hole in the middle anymore.


    Bake for 8-10 minutes, or until the dough springs back when you press on it lightly.  Let them cool slightly on a rack before frosting.


    While they're cooling down, put your chocolate chips and vegetable oil in a small microwave safe bowl and heat in 30 second intervals, stirring in between, until the chocolate has all melted and is smooth and shiny.  Dip your doughnuts into the melted chocolate, place on a wire rack, and top with sprinkles if desired!  You can let the doughnuts sit for a bit so that the chocolate hardens a bit, and is less messy.  


    Make sure to re-grease the doughnut pan between batches.  Even though my pan is non-stick, I didn't re-grease between the 1st and 2nd batches and some of the doughnuts really stuck to the pan.  When I tried to pop them out, some fell apart.  


    Adorable, right?  The ones on the left have plain chocolate frosting and chocolate sprinkles, while the ones on the right are frosted with a mixture of melted chocolate chips and peanut butter chips.  Next time I think I'll frost some solely with peanut butter frosting, and will definitely try to have some more exciting sprinkle options on hand.

    My taste testers (not Maeby this time, don't worry) and I agree--these are delicious!!  In case anyone was wondering, as noted on Handle the Heat and on Lara's blog, the addition of nutmeg to these doughnuts is really necessary.  It gives them a recognizable doughnut flavor.  Without it, they would just end up tasting like chocolate cupcakes rather than doughnuts.  Not that chocolate cupcakes are a bad thing... but we're going for doughnuts here, people! =)

    For those of you who don't have a doughnut pan, I'd highly recommend picking one up.  They're really inexpensive, and a lot of fun.  I found mine for about $10.  I hope you get the chance to try these out!


    If anyone does happen to try them, and gets a little creative with the toppings or modifications to the recipe itself, please let me know how it goes!  

    Saturday, October 8, 2011

    Pumpkin Waffles

    I was informed by my husband the other night that he is "pumpkin-ed out".  o_0 ...  He revealed this to me when I asked what kind of doughnuts he'd like me to bake this weekend (YES!  I recently bought a doughnut pan and am just dying to use it!).  Perhaps he would like... pumpkin doughnuts?  Negatory.  He is (I'll say it again) "pumpkin-ed out".  "Everything you've baked lately has been pumpkin!", he says.  While this may be true... my obsessive use of pumpkin in dishes both savory and sweet has just begun.  He'll have to learn to deal with it.


    So what do I do immediately after he tells me this?  Decide that 1) I am going to bake those pumpkin doughnuts this weekend; and 2) that this recipe for Pumpkin Waffles should be my next post.  


    I used to make some combination of waffles, sausage, and eggs for breakfast every Saturday and Sunday for Sean and myself.  Somewhere during my first year of grad school I became lazy (read: exhausted) and stopped doing this.  Sure, Sean is perfectly capable of making some breakfast--in fact, he makes some mean eggs and bacon--but I feel a little guilty about letting this tradition/ritual slide.  So now I'm trying to bring it whenever I can.  This past Sunday seemed like the perfect time, since we didn't have any plans that involved leaving the apartment.  I figured rather than reaching for the boxed waffle mix, which will do in a pinch, that I'd try a recipe that was a little more labor intensive and interesting.


    Thanks to Better Homes and Gardens for this recipe.


    You'll need:


    2 cups whole wheat flour
    2 tbs brown sugar
    1 tbs baking powder
    1 tsp ground cinnamon
    1/2 tsp salt
    1/4 tsp baking soda
    1/4 tsp ground nutmeg
    1/4 tsp ground ginger
    1 3/4 cups milk
    1 cup pumpkin puree (NOT pumpkin pie filling)
    2 eggs, separated
    3 tbs butter, melted


    In a large bowl, stir together the flour, brown sugar, baking powder, cinnamon, salt, baking soda, nutmeg, and ginger.  Set this bowl aside.


    In a medium bowl, combine the milk, pumpkin, egg yolks, and melted butter.  Add the pumpkin mixture to the flour mixture all at once, and stir to combine.  The batter should be pretty lumpy.


    In a small bowl, using an electric mixer on highs peed, beat the egg whites until stiff peaks form.  Gently fold the beaten egg whites into the pumpkin mixture.  There should be a few streaks of egg white visible still.


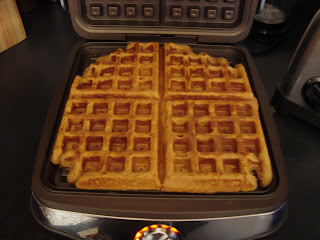
    Heat your waffle maker, pour in some batter (amount will depend on size of your waffle maker), close the lid and bake according to manufacturer's directions.  


    Calphalon waffle maker ftw: Another awesome wedding gift =D
    You can serve them immediately or keep them warm in a 250 degree F oven for a short while.  


    We served ours with a little butter and syrup.


    Sean was kind and patient enough to let me photograph his waffle before digging in.  Thanks, honey!
    The verdict: These waffles were good.  But just good.  There wasn't anything wrong with them... I just kind of felt they were a little lacking in pumpkin flavor.  


    Lack of pumpkininess (totally made that up) aside, these waffles were good!  They end up being a nice warm color, and are tender, and taste good.  They're much better than anything that comes out of a box.  They definitely require more effort than the "just add water" boxed mixes, but are much tastier.  Give them a shot if you have some extra time on the weekend.

    Wednesday, October 5, 2011

    Spicy Chicken and Rice Casserole

    At last, a reprieve from the pumpkin recipes that have been flooding my blog ;).  Don't worry though, I have another pumpkin-related post waiting in the wings, and several more ideas just waiting to be cooked/baked.  I'll probably continue eating pumpkiny foods like a mad woman until I can't stand to look at the stuff.  Maybe not the best strategy... but that's how I roll!

    As I tweeted at Josie of the blog Pink Parsley (great blog for those of you who have never been), my mouth is so happy that I decided to make this casserole.  While I omitted a few ingredients since I didn't have them, and baked the chicken ahead of time instead of poaching it (I knew I'd be pressed for time in the evening), my version stayed pretty true to the original recipe.

    For serious though, don't be daunted by the length of the ingredient list!  It's well worth it, and I'd wager that you probably have a lot of this stuff in your cupboards and fridge anyway.


    You'll need:


    4 tbs unsalted butter
    2 red bell peppers, chopped medium
    1 medium onion, chopped
    3 garlic cloves, minced
    1 chipotle in adobo, minced (Add a 2nd if you really like heat, but these little guys are hotter than you might think!)
    1 tsp ground cumin
    1 tsp chili powder
    1/4 cup flour
    6 cups chicken broth
    1 cup heavy cream
    4-5 (smallish) chicken breast halves, cooked and shredded
    1 1/2 cups white rice
    1 cup (8 oz.) fiesta blend cheese, shredded (or whatever kind you'd like)
    1 can (15.5 oz.) black beans, drained and rinsed
    Juice of 2 limes
    1 1/2 cups frozen corn
    pepper
    1/4 cup scallions, minced


    Topping
    6 oz. tortilla chips (or whatever is left in the bag, in my case)
    2 tbs unsalted butter, melted
    salt and pepper

    Melt your butter in a large, heavy bottomed pot over medium heat.  Add in your bell peppers, onion, and 1 tsp salt.  Cook for ~8-10 minutes, or until the onions and peppers are soft.  Stir in the garlic, chipotles (maybe I'm just a wuss, but seriously watch out for these guys if you don't like much heat!), cumin, and chili powder; cook ~30 seconds.  Stir in the flour and cook, stirring occaisionally until golden, for approximately 1 minute.  Slowly whisk in the cream and broth.

    Stir the rice into the pot, cover, and let it continue cooking on low heat.  Stir it pretty often until the rice has absorbed some of the liquid.  Let it cook for 20-25 minutes.  If things are still looking pretty soupy at this point, don't worry.  It will really thicken up once you put it in the oven.

    While the rice is cooking, you can go ahead and get started on the topping.  Pulse the tortilla chips with melted butter in a food processor until coarse crumbs form (it took ~10 pulses).  Season with salt and pepper.  Set aside.

    After allowing the rice to cook for 20-25 minutes, remove the pot from the heat.  Stir in the shredded chicken, black beans, corn, cheese, and lime juice.  Season with salt and pepper to taste.  Stir in the chopped scallions.

    Now we come to an intersection in the road: Do we 1) Bake it all right now?; 2) Bake some and freeze some?; 3) Freeze it all now?

    It's up to you! 

    If baking immediately: Pour the mixture into a 9x13 baking dish and sprinkle with the crumb topping.  Bake in a 400 degree F oven, uncovered for 25-35 minutes.

    If freezing some or all: Pour the mixture into your desired storage vessel.  Wrap the portion to be frozen tightly with foil and then plastic wrap.  This will be okay in the fridge for about 2 days, or will freeze for up to 1 month.  Thaw the casserole completely in the fridge prior to baking, if freezing.  Bake at 400, covered in foil, for about 1 hour.  Remove the foil and bake for 15-20 minutes longer.


    This casserole is creamy, a bit crunchy from the topping, hearty, filling, and a tad spicy.  It was really, really good.

    This recipe really does make a ton of food.  So if you're one of those types (like me) who loves to freeze meals ahead of time to make things easier on yourself later on, this casserole is probably for you.  We managed to get an 8x8 dish (for dinner that night and leftovers the day after) as well as a mostly-filled 9x13 dish to freeze and eat at a later date out of this recipe.  In fact, I'll probably break this bad boy out of the freezer this weekend.  Can't wait! 

    Monday, October 3, 2011

    Pumpkin Cornbread

    I'll keep this one brief =).  I served this cornbread alongside the turkey chili I posted yesterday.  They really go pretty perfectly together.  This recipe was originally found at Vittles and Bits.  


    You will need:


    1 cup all purpose flour (or whole wheat pastry flour)
    1 tbs baking powder
    1 tsp kosher salt
    1/2 tsp ground cinnamon
    1/2 tsp ground nutmeg
    1/2 cup brown sugar
    1 cup cornmeal
    2 eggs
    1 cup pumpkin puree (NOT pumpkin pie filling)
    1/4 cup vegetable oil
    1 tbs molasses (or honey)


    Preheat your oven to 400 degrees F and grease an 8x8 baking dish.  In a medium bowl, whisk together the flour, baking powder, salt, cinnamon, nutmeg, brown sugar, and cornmeal.  


    In a separate bowl, beat the eggs.  Add the pumpkin puree, oil, and honey.  Stir to combine.  Add the wet ingredients to the dry and mix until just combined.  Pour the batter into the greased pan, and smooth the top out as much as possible.


    Bake for 30 minutes, or until a toothpick or knife comes out clean in the center.


    It was super easy to throw together, and went perfectly with the turkey chili I made over the weekend.  It still tastes like the cornbread that we are all familiar with, but had a nice pumpkin-y background.  Serve it warm, slather it with some butter, dunk it in some chili, and you're good to go! 

    Sunday, October 2, 2011

    Turkey Chili for the Crock Pot

    Crock pot or slow cooker?  I'm sure there's a subtle (or perhaps less than subtle?) difference, but I tend to use the two terms interchangeably.  Regardless, I can't say it enough.  I love using my crock pot.  My mom gave it to me for Christmas a couple of years ago, and I must say, it is pretty awesome.  It's made by Hamilton Beach (and no, they are not sponsoring this post--I just really like the thing!), and has a base and 3 ceramic inserts of different sizes.  There's a 2 qt., 4 qt., and 6 qt. insert.


    Having the different sizes has been really nice, allowing for some versatility depending upon how many people I'll be feeding.  I ended up using the 4 qt. insert for the following recipe.


    I really like recipes like this because they 1) allow me to use my crock pot (see above--I love the thing) and 2) they're perfect for busy/lazy days.  Unfortunately, our day has erred on the side of quite busy, albeit pretty tame.  We did some running around yesterday morning and early afternoon, and came home to do some Fall cleaning around the apartment.  Yes, as you may have guessed, Fall cleaning is Spring cleaning's autumnal counterpart.


    At any rate, it was the perfect recipe to just toss in the crock pot and then go about our business, starting to clean the apartment.  I did take a short break to bake some pumpkin cornbread (recipe forthcoming!) to go alongside our chili.  This combination was particularly nice and comforting given that this weekend has given us the first real signs of fall in Baltimore.  The skies are overcast and the weather is chilly.  


    Alright, I won't delay any longer.  Here's the recipe for Turkey Chili in the crock pot/slow cooker!  Recipe originally found on Amy Bites.

    You'll need:

    1 lb lean ground turkey breast
    1 cup onion, chopped
    1/2 cup bell pepper, chopped
    2 garlic cloves, minced
    1 tbs chili powder
    1 tsp sugar
    1 tsp ground cumin
    1/4 tsp salt
    1 (15 oz.) can kidney beans, drained
    1 (14.5 oz.) can Mexican-style stewed tomatoes with jalapenos and spices, undrained
    6 oz. tomato paste

    Cook your turkey in a large skillet until browned, crumbling it as you cook.  Add the chopped onion, bell pepper, garlic, chili powder, sugar, cumin, and salt.  Stir to combine, and cook for 5-7 minutes more, or until the onions are getting tender.


    Place this turkey mixture in the bottom of a 4 qt. slow cooker.  Stir in the beans, tomatoes, and tomato paste.


    Put the lid on the slow cooker, and cook for 4 hours on low.  It's as easy as that!  Amy also notes that you can make this on the stove top.  Start out cooking the turkey, onions, peppers, etc. in a large pot.  After adding the beans and tomatoes, just bring the pot to a boil.  Reduce the heat and simmer, partially covered, for around 1.5 hours.


    You can top your chili with cheese, some green onions, or whatever else your little heart desires.


    I did end up swirling in some sour cream after taking this picture.  Be forewarned: this chili has a little spiciness to it!  It won't knock your socks off or anything, but it definitely had more kick than either Sean or I were expecting.  I'll probably try dialing down the heat a little more the next time I make it, since neither of us is a big fan of too much heat.  Other than the surprising kick, this chili was really good!  I'll definitely be making more in the near future, and am happy that we have leftovers so that I can take them for my lunch this week.  Give it a try, you won't be disappointed!