."
Showing posts with label pasta. Show all posts

Tuesday, January 3, 2012

Mac-Raff 'n' Cheese

Interesting name, right?  This recipe comes from the blog Patent & the Pantry.  If you follow that link, she provides an explanation as to how the dish got it's name.  I haven't been able to figure out an appropriate name of my own for it (other than omgdelicious), so it goes by the name she gave it.


Patent & the Pantry was one of the first blogs I started reading regularly upon discovering the world of food blogging.  In fact, when I began this blog, I started compiling a list of recipes that I love and knew that I had to share with you.  This was one of them.  Unfortunately, it has taken several months to bring this to you.


I made this on New Year's Eve for Sean, myself, and a couple of friends.  


To those of you who recently vowed to lose weight/get back in shape/eat better: I'm sorry.  To everyone else: you're welcome.


You'll need:


For the tomato sauce base
1 tbs olive oil
1 onion, diced
3 cloves garlic, minced
28 oz. can crushed tomatoes
14 oz. can diced tomatoes
1 tbs balsamic vinegar
pinch of sugar
salt and pepper, to taste
1/4 cup basil, roughly chopped


For the macaroni and cheese
1 box short cut pasta
1/4 cup butter (half stick)
1/4 cup flour
5 cups grated cheese (use whatever you'd like!)
3 cups milk
salt and pepper, to taste


Heat olive oil in a large pot over medium heat.  Add the onions, saute until translucent.  Add the garlic and stir for about a minute.  Add the can of crushed tomatoes, and let it simmer for a bit.  Then add in the can of diced tomatoes.  Stir in the balsamic vinegar and sugar.  Allow to simmer until the sauce has thickened and reduced a bit.  


Preheat the oven to 425 degrees F.


While things are thickening up and the oven is preheating, cook the pasta according to package directions.  As the pasta is cooking, you can start on the cheese sauce.  


Melt the butter in a pot over medium-low heat.  When the melted butter is frothy and bubbling, add the flour and whisk until it is well-blended.  Continue cooking for a couple of minutes, so that the raw flour taste can cook out.  Slowly add the milk, whisking constantly to prevent lumps from forming.  


After the milk-flour mixture has thickened slightly, add in 4 cups of shredded cheese.  Stir it all together until it melts, and add salt and pepper to taste.  If it looks like it's too thick, you can always add a bit more milk.
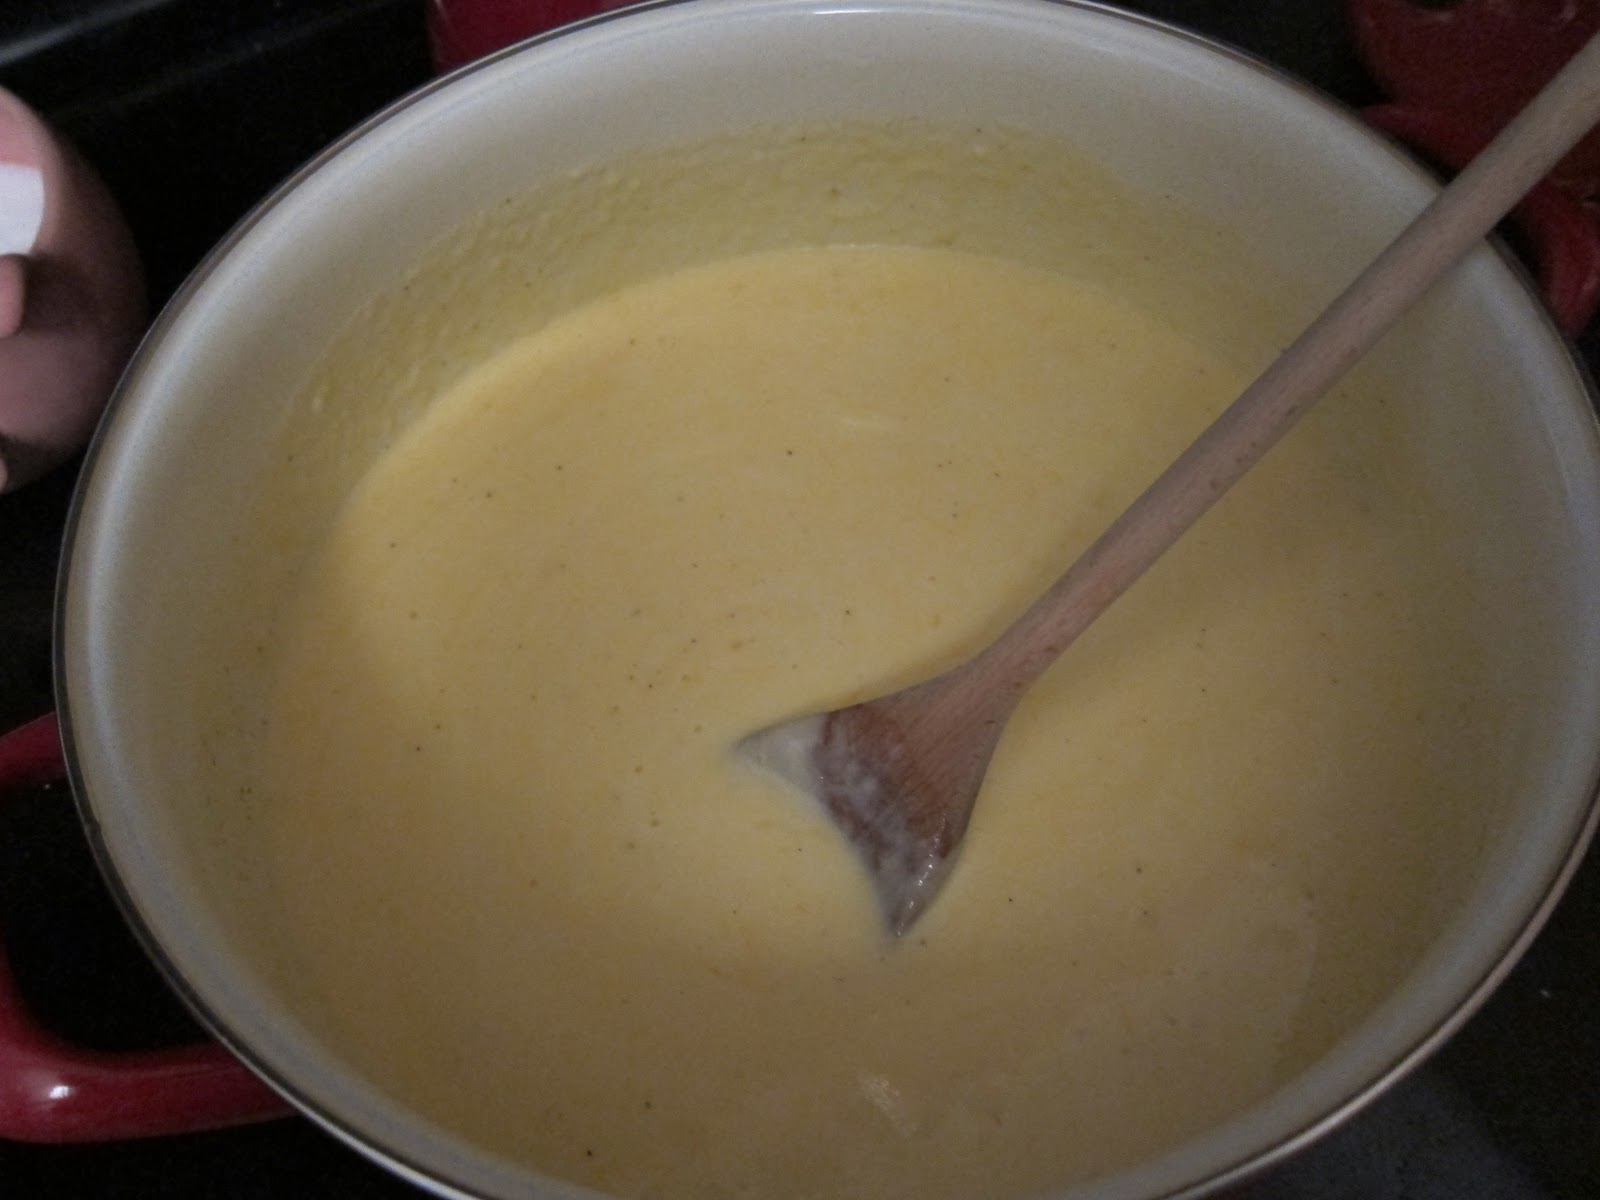


Drain the pasta once it's done, and return it to the pot.  Add the cheese sauce to the pasta and stir to coat.


Put the tomato sauce in the base of a casserole dish.  Top with the macaroni and cheese.  Sprinkle everything with the remaining 1 cup of cheese.


Bake covered for 45 minutes - 1 hour.  Remove the lid and bake for an additional 10-20 minutes.


I usually bake up a smaller casserole for Sean and myself right away, and put the rest in a larger casserole dish to freeze and have at a later time.  To freeze any or all of this, follow all of the above directions, but stop before baking it.  Wrap it up and pop it in the freezer.  Just make sure to let it thaw before baking.  You will likely have to tack on some extra baking time, even after it has thawed.     


Seriously, one of the best things ever.  Try it.  Immediately.  I wouldn't lie to you, especially about something that is as heavily cheese-laden as this recipe.


The macaroni and cheese component is creamy and fantastic, and the sauce is tangy and savory, given an extra dimension with the addition of the balsamic vinegar.  And the layer where they two components meet?  Amazing.

Monday, December 12, 2011

Creamy Orzo "Risotto" with Butternut Squash

With this being a perfect recipe for Meatless Mondays, I really should have posted this yesterday, but I was on the road for most of the afternoon, and then really didn't feel like doing much of anything once I got back to Bmore.  So here it is, a bit late.  This is another Weight Watchers recipe, and I've modified it slightly.


Although the original title of the recipe indicates that it's a risotto, it really isn't.  But it's a good, far less labor intensive mock risotto.


You'll need:


Cooking spray
1 small-medium butternut squash, cubed
1/2 tsp olive oil
salt and pepper, to taste
1 tbs unsalted butter
1/2 onion, chopped
1 clove garlic, minced
1 cup uncooked orzo pasta
1 1/2 cups water
1 cup chicken broth
1 tsp dried thyme
1/3 cup parmesan cheese, shredded
salt and pepper, to taste


Preheat your oven to 425 degrees F.  Line a baking sheet or two with foil and spray the foil with the cooking spray.  Put your cubed squash and olive oil in a gallon zip top bag.  Season with salt and pepper.  Seal the bag and toss everything around until the squash is well coated.


Put the squash on the baking sheet(s) in a single, even layer.  Roast in the oven for 20-25 minutes, tossing halfway through until the squash is tender and lightly browned.


Meanwhile, melt the butter in a saucepan over medium heat and add the onion and garlic.  Sautee until the onion is translucent.  Add the orzo.  Stir constantly until the orzo begins to smell toasty.  Add the water, broth, and thyme.  Bring to a boil.  Reduce heat to low and simmer, uncovered for about 15 minutes or until all of the liquid is absorbed.  Stir occasionally.


Stir in the cheese and roasted squash.  Season well with salt and pepper.

It's really nice and creamy, despite not having to go through the whole ordeal of constant stirring.  The saltiness of the cheese and sweetness of the squash contrast with one another nicely.  Enjoy! 

Wednesday, September 28, 2011

Penne with Zucchini, Pesto, and Chicken

Today is already shaping up to be one of those days...  I figured it's time to take a little break, and update my blog.  Preferably with something simple... a post that is largely completed.  Luckily, this Penne with Zucchini, Pesto, and Chicken fit the bill.  I hope you all enjoy this one as much as Sean and I did, especially on this rainy, dreary day (but really I hope that the weather is better wherever you are!).

Adapted ever so slightly from Kalyn's Kitchen.


You'll need:


1 box short cut pasta
salt, for seasoning pasta water
2-3 zucchinis, cut into half moon shapes (2 if medium, 3 if small)
2 cloves garlic, minced
1 tbs olive oil
salt and pepper, for seasoning zucchini
basil pesto, 2/3 cup or to taste
1/2 cup pasta cooking water
2 small chicken breasts, cooked and shredded

Put a pot of salted water on the stove to boil.  While waiting for it to come up to a boil, heat 1 tbs of olive oil in a big pan, add the garlic, and satuee for approximately a minute.  Once the garlic is fragrant, add the zucchini and season with salt and pepper. 

The pasta water should probably be boiling by now so add your pasta to the pot.  When your zucchini is crisp-tender, add the pesto and gently combine.  Once your pasta is done, scoop out ~1/2 cup of the pasta water and set it aside.  Then you can go ahead and drain your pasta and add it to the zucchini on your stove.  Mix everythig up, and add as much reserved pasta water as you need to get the mixture combined nicely. 

I threw some cooked shredded chicken in there, too right at the end.  This dish held up pretty well for 2-3 days in the fridge, but is really best when eaten right after preparing it.  You could add your own twist, too, if you'd like.  I bet it would be good with any kind of pesto, and would probably be pretty great with some grilled shrimp thrown in, too.  Enjoy! =)

Thursday, September 8, 2011

Roasted Garlic and Cauliflower Pasta

Adapted ever so slightly from the recipe at Mel's Kitchen Cafe.


I'll admit, I've never been a huge fan of cauliflower.  It's just never really done anything for me.  But this recipe appealed to me for several reasons: 1) I'm trying to cram more vegetables into my diet, 2) it has cheese (c'mon people), and 3) anything with 2 full heads of roasted garlic just has to be good.  Forget what you know about cauliflower.  If you've never had it roasted in the oven, you don't know what you're missing.  It does something really nice to the cauliflower, and makes it almost nutty tasting.  I'm a cauliflower convert now.  Even my picky-when-it-comes-to-vegetables husband liked it!  It made a delicious side dish paired with some grilled chicken.


You'll need:

2 heads garlic, skins removed, top quarter of heads cut off (on the pointy side of the garlic) and discarded
6 tbs plus 1 tsp extra-virgin olive oil
1 head cauliflower (roughly1 1/2 pounds)
1 tsp salt
1/4 tsp pepper
1/4 tsp sugar
1 pound short cut pasta (For example, fusilli, rotini or campanelle. We used cute mini rotini.)
1/4 tsp red pepper flakes
 1 tbs fresh parsley leaves, chopped
2 oz. Parmesan cheese, grated or shredded (about 1 cup)
1/4 cup chopped walnuts, toasted


Adjust an oven rack to the middle position, place a large rimmed baking sheet on the rack, and heat the oven to 450 degrees Fahrenheit.
Cut one 12-inch sheet of foil and spread it flat on the counter. Place the garlic heads, cut-side up, in the center of the foil. Drizzle ½ tsp olive oil over each head and fold up the sides of the foil to seal well. Place the foil packet directly on the oven rack (not on the preheating baking sheet) and roast until the garlic is very tender, approximately 40 minutes. Remove the foil packet from the oven, open the foil and set it aside to cool.
Come to mama.

While the garlic is roasting, trim the outer leaves of the cauliflower and cut the stem flush with the bottom. Cut the head from pole to pole into 8 equal wedges and then cut the cauliflower into large bite-sized pieces. Place the cauliflower in a large bowl or in a zip top bag; toss with 2 tablespoons oil, salt, pepper, and sugar.
Pre-baking.

Remove the hot baking sheet from the oven. Carefully transfer the cauliflower to the baking sheet and spread into an even layer. Return the baking sheet to the oven and roast until the cauliflower is well browned and tender, 15 to 20 minutes.  It took mine about 20 minutes.
Post-baking.  Look at that golden brown goodness.

While the cauliflower roasts, bring 4 quarts of water to a boil in a large pot. Add 1 tbs salt and pasta; cook until al dente. Squeeze the cooled, roasted garlic cloves from their skins into a small bowl. Using a fork, mash the garlic to a smooth paste, then stir in red pepper flakes and 2 tbs lemon juice. Slowly whisk in remaining 1/4 cup oil.
Drain the pasta, reserving 1 cup cooking water, and return the pasta to the pot. Add the chopped cauliflower to the pasta; stir in the garlic sauce, ¼ cup cooking water, parsley, and ½ cup cheese. Adjust the consistency of the pasta with additional cooking water and season with salt, pepper, and additional lemon juice to taste. Serve immediately, sprinkling with remaining ½ cup cheese and toasted nuts.

Seriously though, check out Mel's picture, because my atrocious photography doesn't do this justice.  Shoddy photography aside (c'mon guys, I'm a grad student and make peanuts... I can't afford a nice camera! =) ), this is really really good.  Even if you think you don't like cauliflower, give it a shot!  You won't regret it!

Monday, September 5, 2011

Caprese Salad Pasta

This was really intended to be made with leftovers from a Caprese salad (see previous post), but can definitely be made without the help of leftovers.  That being said, I have never, ever been this excited about eating leftovers.


This recipe isn't very exact, so you can modify it as you see fit based on how many people your'e serving, your personal preferences, and so on.


You'll need:


Tomatoes
Fresh mozzarella
Basil
Salt and pepper
Extra-virgin olive oil
(Or substitute leftover Caprese salad for the above ingredients)
2 cloves garlic
Your favorite pasta (I used mini penne because they're adorable!)


Separately, dice your tomatoes and mozzarella and set them aside.  


Set a large pot of water on the stove to boil.  Once it comes to a boil, cook the pasta according to the directions on the package.


Heat a little olive oil in a large skillet or sauce pan.  Mince the garlic and add to the pan.  Once the garlic is fragrant, add the diced tomatoes.  Allow them to simmer away.  Give the tomatoes a squish with the back of a spoon periodically.  The tomatoes will cook down and release their juices, making a nice simple sauce.  Toward the end of the cooking time, toss in some basil (either whole leaves, or chopped/torn/shredded/etc.).  


You can then add the cooked, drained pasta to the pan with the tomatoes.  Toss it up a bit, and then add the diced mozzarella cheese.  The cheese will likely melt a bit and become pretty stringy, and gooey.  It really is a thing of beauty.


Add a little more fresh basil on top, and you're good to go.

Wednesday, August 31, 2011

Basil Tuna Pasta Salad

Hi everyone!  We survived Hurricane Irene this past weekend.  Thankfully things weren't as bad as they were initially made out to be in the Baltimore area.  We never even lost power (phew!), and other than being stuck inside all day on Saturday, nothing noteworthy occurred.  I know many people were actually affected by the hurricane, and my thoughts go out to them!


We did stock up on some (okay, way too many) non-perishable food items before the storm hit, just in case we were without power for a few days.  So we've been trying to eat through most of those, and we haven't had a chance to hit up a grocery store this week, so ingredients for blog-worthy recipes are at a premium.  However, I'm working from home today, and can't bear to eat another can of soup.  I found this recipe (posted by guest blogger Sawsan from Chef in Disguise) on the blog Eat Yourself Skinny a few days ago and bookmarked it.  When I realized that I had all of the necessary ingredients on hand, I knew I just had to make it.  Btw, if you haven't been to Eat Yourself Skinny, please check it out!  Even if you aren't trying to lose weight, her recipes are pretty darn tasty looking.  The recipes on the blog Chef in Disguise aren't too shabby, either ;).


You can find the original recipe here, and the recipe with my modifications can be found below:


1 box pasta (I had some radiatore lying around)
1 can tuna
1/2 cup kalamata olives, pitted and chopped
1/2 cup corn
1 can cannellini beans, drained and rinsed
10 or so basil leaves, chopped


Dressing:
1 tbs mustard (I used Dijon)
juice of 1 lemon
1 tsp dried oregano
1/4 cup olive oil
salt


Cook the pasta according to the instructions on the box, drain and allow to cool a bit.  In a bowl, whisk together the lemon juice, mustard, oregano, and salt.  Drizzle the olive oil in while whisking, until incorporated.  Add the tuna, olives, corn, beans, and basil to the pasta.  Add the dressing and toss.


Not the world's greatest photography, but you get the idea.

It's really quite good!  All of the flavors meld together well, and the basil flavor is wonderful.  Please enjoy!

Thursday, August 25, 2011

Pasta Salad

My husband's side of the family will certainly recognize this one.  I made this pasta salad last summer for my father-in-law's birthday party, and have since been informed that I will be making this for all future family get-togethers.  It doesn't really have a name, and there's no official recipe written down anywhere, but it came into being when I combined two different pasta salad recipes: one made by an old college roommate and one that my mom throws together every now and then.  Feel free to jazz it up any way you see fit.  This is how I usually go about making it.

You'll need:


1 box short cut pasta (I generally use rotini)
1-2 bell peppers, depending on size
1 small red onion
A few ribs of celery
1 8 oz. block of sharp cheddar cheese
1 16 oz. bottle Italian Dressing (usually the Kraft Zesty Italian, either low- or full fat will do just fine; and don't worry, you probably won't use the whole thing!)
McCormick Perfect Pinch Salad Supreme seasoning, to taste

It's pretty simple.  Just boil some water, add the pasta, and cook according to directions on the package.  While the water boils and the pasta cooks, you can get started chopping the add-ins.  

I like to give my bell peppers, onions, and celery a large dice before tossing them into the bottom of a large bowl/serving dish.  You'll be thankful you used a big bowl when it comes time to toss everything together.  Cube the cheddar and toss it into the bowl as well.

Once the pasta is cooked, I like to put it in a colander and cool it off a bit by running some cold water over it.  That way the cheese doesn't start melting immediately upon contact with the noodles.


Once the noodles are cooled (or at least not steaming anymore, if you're like me and can't wait any longer), add them to the bowl on top of the veggies and cheese.  Toss everything up from the bottom to make sure that everything is well-distributed throughout.


Next add about half of the bottle of Italian dressing to the salad.  Toss it up a bit, and then add the the Salad Supreme seasoning and toss again.  The bottle of seasoning says to add like 1/4 cup, but I never measure.  Usually I just add a bit, mix it up, and taste as I go until it's where I'd like it to be.  


Make sure to hang onto that leftover salad dressing.  If you leave the pasta salad sit for any length of time (in the fridge or otherwise), the noodles tend to soak it all up, and you'll need to add more to make sure it isn't so dry just prior to serving.  Feel free to throw some more of the Salad Salad seasoning in there before serving, too.


And there you have it!  Though this pasta salad is especially good during the summer months with picnic-y food, it's great year round.  It's also really easy to adjust the recipe, depending upon how many people you'll be serving. 


Enjoy!!