."

Wednesday, November 30, 2011

Autumn Vegetable Pot Pie

This post has been sitting around in my backlog of recipes for some time now.  I figured it's about time it saw the light of day.  You know, before autumn is officially over and winter is upon us full force.  Not that you can't make this during the winter... but the name is "Autumn Vegetable Pot Pie" after all.


Anyway, the recipe for this seasonally-appropriate pot pie was found at the blog Heather Christo Cooks.


You'll need:


1/4 cup butter
1 cup carrots, chopped
1 cup celery, chopped
1 cup leeks, chopped
1 small butternut squash, chopped
2 medium potatoes, peeled and chopped
1 cup white wine (I used a sauvignon blanc)
1/4 cup flour
4 cups broth (chicken or vegetable)
kosher salt
~1 tsp dried thyme (fresh would be great if you have it)
pre-made refrigerated pie crusts
1 egg, beaten
water


In a large, heavy pot, melt your butter and cook until browned.  Add the vegetables and coat with butter.  Cook until slightly softened.  This took quite a while for me (~15-20 minutes... no really, it did).  


Add the white wine, and simmer until your vegetables are nice and soft.  Add the flour, and stir until the vegetables are well-coated with flour.  Cook for a couple of minutes until the raw flour taste has cooked out.


Add the broth and simmer for about 15 minutes until the stew base is slightly thickened.  Season with Kosher salt and dried thyme.


While your filling is simmering away, preheat your oven to whatever temperature your pre-made pie crusts' packaging tells you.  Place one crust in the bottom of a pie pan.  Fill the pie pan with filling and top with the other crust.  Trim the edges to remove excess.


Prick the top with a knife or fork to allow steam to escape.  Combine the beaten egg with a little water.  Brush the top with the egg wash.


Bake according to your pie crusts' packaging directions.  Serve hot.

The finished product!
I enjoyed this pot pie immensely.  Sean's assessment?  "It would be better if there was meat in it."  *Sigh*

I would make a few tweaks next time around, though.  1) I'd boil the potatoes separately and then add them to the filling once the broth was added.  2) Add some chicken or something for Sean.  3) Add some mustard or other flavorings to punch up the filling a bit.  4) Try to thicken the filling a bit.  You can see in the picture that it's still pretty soupy.  It thickened a lot in the fridge overnight (it makes for great leftovers!)

All in all it was very good.  Enjoy it!

Monday, November 28, 2011

Breakfast Casserole with Sausage and Egg

Hello everyone!  I hope that you had a safe and happy Thanksgiving holiday.  Ours was rushed (as always), but very nice.  It was so good to go back to Pittsburgh for a few days and spend time with our families and some friends.


I'll keep this one short and sweet, since I have quite a bit of work to catch up on following our long weekend.  I make this breakfast casserole every time we have visitors come for the weekend.  It's incredibly versatile, and simple to make.  The best part?  You can make it the night before.  It's great; just pull it out of the fridge while the oven preheats, stick it in the oven, and voila!  You have breakfast.  No slaving over the stove while your guests are having fun elsewhere without you.


My mom makes something very similar to this on Christmas morning, which is where I got the inspiration for this.  I'm sure there's a recipe somewhere, but I don't have it.


You'll need:


16 oz. breakfast sausage (1 tube)
1 loaf good French or wheat bread (you probably won't use the whole loaf)
10 eggs, beaten
splash of milk
salt and pepper
shredded cheddar cheese


Cook the sausage in a large skillet over medium heat until crumbled and browned.  Set aside for a few minutes. 


Grease the heck out of a 9x13 glass pan with cooking spray or butter.  Trust me on this one.  If you want to be able to clean this pan in a reasonable amount of time, you will need to grease it (Sean can back me up on this one).  Cut your bread into 1 inch cubes and place evenly in the greased pan.  Or alternately, just rip it up, like I do.


Beat your eggs and a splash of milk in a medium-large bowl.  Add salt and pepper to taste.  Evenly layer the cooked sausage on top of the bread.  Pour the egg mixture over the casserole.


Top the whole casserole with shredded cheddar (as much as you'd like; not pictured here).  If you'll be baking it straight away, place your uncovered casserole in a preheated oven (350 degrees F) for 30-45 minutes. 


If you plan to make this ahead, cover the dish and place it in the fridge overnight.  The next morning, remove the casserole from the fridge and allow it to start coming back up to room temperature while the oven preheats to 350.  Bake uncovered for 30-45 minutes, or until the eggs are done (casserole should be firm and spring back when touched in the middle, and nothing should be runny).


Scoop some up and enjoy!


You can customize this dish any way you'd like.  It's good with different flavors of sausage, and with some vegetables thrown in.  It's also good topped with some salsa or maple syrup.

Tuesday, November 22, 2011

Make Ahead Mashed Potatoes

So I realized that I haven't been posting any Thanksgiving recipes.  That's probably because I don't cook the Thanksgiving dinner around these parts.  It's almost always my mom (or my aunt, this year) and Sean's mom that do the cooking.  I found this recipe for make ahead mashed potatoes on the blog bakedbree.com.  If you haven't been there yet, please check it out.  She always has some really great stuff.  


In case anyone out there is in need of a last minute recipe for their holiday table, or if you just want to save yourself some time and hassle on the day of, take this recipe into consideration.  I made it to go along with my Crock Pot Kielbasa, Pork, and Sauerkraut (sauerkraut swirled up with mashed potatoes = amazing) this past weekend.  


This recipe has been adapted slightly from the original.  You can really fudge the amounts if you want, until you get something that you enjoy.


You'll need:


2 pounds of potatoes, peeled and diced
1/2 head of cauliflower, chopped into small florets
1/2 cup of milk, warmed
1/2 stick of butter, room temperature
4 oz. cream cheese, room temperature
salt and pepper to taste
2 tsp cream of tartar 


Start the potatoes and cauliflower in cold, salted water.  Bring to a boil.  Boil until a fork can be inserted into the potatoes and cauliflower easily.  Drain them in a colander.


Now you can either run your potatoes and cauliflower through a ricer, a food mill, or just whip them up really well with a handheld mixer.  I opted for the mixer, since that's all that I have.  Put your vegetables in a bowl and whip them up really well with the mixer until they're fluffy.  Add the butter, cream cheese, salt, pepper, and cream of tartar.  Add about half of your milk. Whip everything up again, and add more milk if needed.  Stop to taste everything.  Taste some more if you need to.  I won't tell.


Spray a casserole dish with cooking spray and spread the potato mixture into it.  At this point you can either bake straight away (preheat to 350 degrees F and bake for about 30 minutes) or wrap it up, place in the fridge, and bake the next day.  If you opt to bake it the next day, just make sure to take it out of the fridge and let it come to room temperature or it will take forever to warm up in the oven.


I have to tell you, these potatoes are awesome!  They're really fluffy (thanks to the cream of tartar) and creamy, and taste amazing.  I think my adaptations from the original recipe are pretty obvious... but I had to scale it down by about half since I was only feeding 4 people for dinner (and wanted some leftovers, but not a ton), and added some cauliflower.  I'd love to say that I was attempting to be somewhat health conscious with that addition, but in reality I had that cauliflower in the fridge and it probably wasn't going to get used if I didn't do this.  Ultimately it was an excellent call.

If you want to make your Thanksgiving dinner prep a little easier on yourself, please consider adding these potatoes to your menu!  Anything that can be done the night before will surely help out with your stress level just prior to dinner time.  Enjoy! =)

Monday, November 21, 2011

Milky Way Cake

Wow, it's been a week since I've posted a new recipe!  I guess that results from a combination of not feeling particularly inspired lately, and also being pretty busy.  Friends of ours were down this weekend to visit and celebrate Sean's birthday.  I did a lot of cooking and baking in preparation for their visit, so you can expect quite a few posts in the near future.  


That's Sean doing his Tom Haverford face.  If you don't know who that is, go watch Parks & Recreation.  You won't regret it.
I saw this recipe on The Pioneer Woman's blog months ago, and had been waiting for Sean's birthday to roll around.  He loves Milky Way candy bars, so I thought this would be perfect for him.  In reality, this cake should have an alternate title: "Oh My God, Call Wilford Brimley Because I Just Got the Diabeetus".  Potential metabolic conditions aside, this is a pretty good cake!  I'm not nuts about Milky Ways like Sean is, so that probably has something to do with me not being over the moon about it.  

You'll need:

11 full-size Milky Way bars, divided use
3 sticks butter, divided use
2 1/2 cups all purpose flour
1/2 tsp salt
1/2 tsp baking soda
1/2 cup buttermilk
3 tsp vanilla extract, divided use
2 cups granulated sugar
4 eggs
2 cups powdered sugar
1 dash salt
1/2 cup milk (more if needed)
1 cup pecans, finely chopped


Preheat your oven to 300 degrees F.  In a large sauce pan or double boiler over very low heat, melt 8 of the Milky Way bars together with 1 stick of butter, stirring to combine.  Once melted, remove from heat and set aside.  I won't kid you... it's going to look a little gross there for a while.  You're going to think that you made a mistake.  But you haven't  It will start to look more appetizing.


See, it's looking kinda nasty.

Ahh... much better.
Sift the flour and salt, then set aside.  Mix the baking soda with buttermilk and add 2 tsp of vanilla.  Set this aside also.


Cream 1 stick of butter with the 2 cups of granulated sugar.  Add the eggs 1 at a time.  Add the flour mixture and buttermilk mixture alternately to the creamed mixture, mixing after each addition.  Add the melted candy bar mixture to the mix and combine.


Pour the batter into a greased jelly roll pan or 9x13 baking pan and bake for 1 hour or until a knife inserted into the center comes out clean.  Mine took just over an hour.


Be more patient than I am and make sure that everything is well combined.  See the lighter swirls there?  Yeah, I was in a rush.
Now, to make the icing.  Melt the remaining 3 Milky Way bars with the remaining 1 stick of butter in your saucepan or double boiler.  Hey, no one said this was low fat.  Add the powdered sugar, dash of salt, milk, 1 tsp vanilla, and chopped pecans.  Stir over low heat.  Feel free to add some more milk if it looks a little tight.


Pour the icing over your cooled cake and allow to set.  This is a super sticky cake (who would have thought since it contains almost a dozen candy bars, right?), so don't expect things to be nice and neat when slicing.


Congratulations!  You now have Type II diabetes.  Enjoy the cake =)


Monday, November 14, 2011

Creamy Cauliflower Cheese Soup

Hi everyone!  I found the recipe for this dee-licious soup here, at Very Culinary, and I have to tell you... I really really wish I still had some of it right now.  You see, I'm sick.  It's nothing terrible, just a bad head cold.  But it's enough to keep me home from school so that I don't go infecting everyone around me.  It is the school of public health, after all.  You have to think about these things! ;)

Anyway, the soup is really good.  It's pretty healthy (depending on how overboard you go with the cheese...), and very creamy despite there being no cream or milk in it.

You'll need:

2 tbs unsalted butter
2 shallots, minced
1 medium yellow onion, chopped
Kosher salt, to taste
1 medium potato, peeled and diced
2 cloves garlic, minced
3 1/2 cups vegetable or chicken broth
1/2 head cauliflower, chopped into small florets
2/3 cup sharp cheddar cheese, shredded plus a little more for garnish
2 tsp Dijon mustard

Melt the butter in a large pot on your stove top over medium-high heat.  Add the shallots and onion, cook until onion has softened, about 3 minutes.  Stir occasionally.  Season with salt and add potato, garlic, and broth.  Cover the pot and bring to a boil.  Lower the heat to a simmer, and let it cook for about 8 minutes.  Add the cauliflower and cook for about 10 additional minutes, until the cauliflower is tender.  Stir in the cheese and mustard.

Puree everything with an immersion blender (or a regular blender... just make sure to work in batches!) until you've reached your desired consistency.  Add additional broth or water if the soup is too thick.  Season with additional salt to taste.  Serve warm, topped with more cheese.


Thursday, November 10, 2011

Creamy Pumpkin Peanut Butter Dip

I served this dip at our Halloween party a few weeks ago, and it was delicious!  The original recipe can be found at Clean Eating Chelsey.


You'll need:

1 cup pumpkin puree (not pumpkin pie filling)
1/3 cup peanut butter (I used creamy)
1/4 cup maple syrup
1/2 cup milk (or almond milk)
1 tsp vanilla
1/2 tsp cinnamon
1/4 tsp nutmeg

Combine all of your ingredients in a small saucepan and cook over medium heat.  Stir frequently as the ingredients warm up, and whisk until smooth.  Once the mixture comes to a slow boil, lower the heat and cook for another 5-10 minutes.  Stir this occasionally to avoid scorching your dip.  You can serve this hot or cold (I served mine chilled) with some fall fruit, graham crackers, or other baked goods.
I served mine with graham crackers and some granny smith and gala apples.  After slicing the apples, I squirted a little lemon juice over them to prevent premature browning.  As it turns out, the lemon juice really ads a nice little zing that works really well with the dip, in addition to keeping the fruit looking pretty.


This was a big hit at the party, and very simple to throw together.  I look forward to making it again, and will likely whip it up when we have friends in town next weekend =).  Enjoy!

Wednesday, November 9, 2011

Crock Pot Kielbasa, Pork, and Sauerkraut

I am not entirely sure of this recipe's origins.  I got it from my mom, who makes it every New Year's Day.  I do the same now, but also make it at other times of the year.  It's particularly good when the weather is at least a little chilly, since it's pretty hearty.  Don't let the weather limit you, though!  One year Sean requested that we have it for Easter dinner when we were spending the holiday here in Maryland alone.  This makes a lot of food and is really intended to be eaten with a group.


You'll need:


2 lbs kielbasa, cut into large pieces
1 small pork roast (1 - 1 1/2 lbs)
2 large cans sauerkraut, drained
1 medium onion, chopped
1-2 tbs caraway seeds, or to taste
1/3 cup brown sugar
1 can cream of celery soup
1 cup monterrey jack cheese, shredded


This first part is optional.  I just like to give my pork roast a little head start before putting it in the crock pot.  It cuts down on the overall cooking time (which believe me, you'll be happy about later when you smell the awesomeness emanating from your crock pot).  Plus, I'm a little paranoid about underdone meat.  Don't ask why; I don't really have a good reason.  Heat a large skillet with a little vegetable oil on medium high.  Sear the pork on all sides.  I then like to cut the roast up into a few big pieces.  Set the pork aside for a second.


Alternately, if you're not a crazy trichinosis-fearing person like me, you can just cut your pork into a few big hunks and bury it in the other ingredients once you get them in the crock pot.


Combine the cream of celery soup, brown sugar, and sauerkraut in a crock pot (I used the 6 qt. insert).  Stir in the onion, caraway seeds, and kielbasa.  Nestle your pork down in the mixture, too.


Cover and cook on low for ~6 hours.  You can always jack it up to high for the first hour or so to speed things up if you're impatient like me.  Either way, check that pork with a thermometer before serving!  It should reach an internal temperature of 160 degrees F.  It will likely be falling apart after 6 hours, which is exactly what you want to see.  


Right before serving, stir in the 1 cup of jack cheese until it melts.  Dig on in!  I like to eat the kielbasa and pork, along with a little sauerkraut on a nice crusty bun, and then serve some mashed potatoes (no gravy, please) on the side.  Make sure to mix some sauerkraut into those potatoes, while you're at it.  You won't regret it.


We had some guests in town a couple of weeks ago, and I made this for them.  It was a nice choice because I didn't have to spend a long time in the kitchen.  I just threw everything together after I put my breakfast casserole (recipe to come soon!) in the oven, and voila!  We had a delicious late lunch.  

This is awesome.  It makes me a very happy Pollock.  When I said earlier that it's intended to be eaten with a group... that's not a hard and fast rule.  Sometimes I make it for just Sean and myself, and then we have a buttload of leftovers.  It's great reheated, too.  Please give this a try!  You will not regret it.

Monday, November 7, 2011

Brown Rice Salad w/ Tomatoes, Spinach, Black Beans, & Feta

I would like to start this post with a disclaimer, and an apology of sorts.  I know I've seen this recipe (or one very very similar to it) on someone's blog.  I could have sworn that I bookmarked it, but can't seem to find the original post.  If you would like to lay claim to it, or know who should get credit for it, please let me know!  Sorry, guys.


This is a tasty, healthy, lunch option.  It's great hot, cold, or room temperature.  And it's super simple to make.


You'll need:


1 cup brown rice
2 cups water
2 cloves garlic, minced
1-2 tbs olive oil
1 bag baby spinach
1 tsp salt
1 pint cherry or grape tomatoes, halved
1 can black beans, drained and rinsed
feta cheese, crumbled


Cook brown rice according to package directions.  Mine indicated that I should combine 1 cup uncooked brown rice and 2 cups of water in a saucepan over medium-high heat, until it comes to a boil.  Turn the heat back down to low, and cover for 40-50 minutes or until the rice is done.


While the rice is cooking, heat the olive oil and garlic in a large skillet over medium heat, just until the garlic is a little fragrant.  Add the spinach to the pan and stir to coat with the olive oil.  The spinach should start wilting pretty quickly.  Keep stirring it around every now and then so that everything gets nice and wilted.  You can also put a lid on your skillet and walk away for a few minutes to speed up the wilting process.  Toss the salt in there while you're at it.


Once the spinach is wilted, try and refrain from eating all of it out of the pan.  Add the tomatoes and allow them to break down a little bit.  Once the tomatoes are giving off their juices, you can go ahead and add the black beans.  


After the brown rice is done, toss that in the skillet too.  Stir everything around to combine.  Feel free to add some feta cheese, to taste.  


You can eat this piping hot, room temperature, or cold.  It's fantastic no matter what you choose.


Also, I'm on Pinterest now!  Feel free to follow me @hankycowtipper.  I really have no idea what I'm doing on there, but will figure it out sooner or later. 

Saturday, November 5, 2011

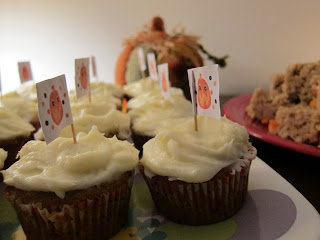
Pumpkin Spice Cupcakes with Cream Cheese Frosting

Yes, yes... it is another pumpkin recipe.  I figure I can still indulge in my pumpkin obsession safely until Thanksgiving.  So you're getting more pumpkin recipes until then =). 


Thank you to 6 Bittersweets for this delicious cupcake recipe. 


You'll need:


Cupcakes
1 cup PLUS 2 tbs all purpose flour
1/2 tsp ground cinnamon
1/4 tsp ground ginger
1/8 tsp ground nutmeg
1 tsp baking powder
3/4 tsp baking soda
1/4 tsp salt
1 cup canned pumpkin puree (NOT pumpkin pie filling)
1/2 cup milk
1 tsp vanilla extract
6 tbs (3/4 stick) unsalted butter, softened
1 large egg, room temperature
1 large egg yolk, room temperature


Cream Cheese Frosting 
3/4 to 1 cup unsalted butter, room temperature
1 1/2 to 3 cups powdered sugar
1 tsp vanilla extract
8 oz. cream cheese, cold and cut into 6-8 chunks


Begin by preheating your oven to 350 degrees F.  Line your muffin pan.  Sift the flour, spices, baking powder, baking soda, and salt into a medium bowl.  Set that aside for the time being.  In a separate bowl, whisk together the pumpkin, milk, and vanilla.  Set this aside also.


Using an electric mixer (handheld or stand mixer) on medium-high, cream together the butter and sugar until they are light and fluffy in texture.  Turn the mixer speed down to low, add the egg and egg yolk.  Beat until well-combined.  Add 1/3 of the flour mixture, then 1/2 the pumpkin mixture, then 1/3 of the flour mixture, 1/2 of the pumpkin, and then finally the last 1/3 of the flour mixture.  Make sure to mix to combine after each addition.


Fill the baking cups 3/4 full.  Bake 20-27 minutes, or until a toothpick comes out clean after inserting it into the middle of a cupcake.


Cool for a few minutes in the pan, then remove to finish cooling on a baking rack.  Once they are completely cooled, feel free to frost these bad boys =).


To make the frosting, sift the powdered sugar in a small bowl.  In a larger mixing bowl, using either a handheld mixer or your stand mixer, cream the butter, 1 1/2 cups of powdered sugar, and vanilla until everything is thoroughly blended.  Add the cream cheese, one chunk at a time, beating after each addition.  Work it all in until everything is just smooth.  Give it a taste!  If you think you need more sugar, go a head and add a little.  Be careful not to over beat the frosting.  If you're not using the frosting right away, you can go ahead and refrigerate it.  Just make sure to beat it a little before using it.


These guys made a lovely addition to the spread I put out for our Halloween party.  Though the cream cheese frosting was great, I'd even eat these cupcakes plain.  Hurry up and enjoy these before your family and friends revolt against you and complain about all of the pumpkin recipes you've been making! =)

Oo, and don't forget: You can follow me on Twitter @heywhocutcheese and my blog has a Facebook page, too!  Just search for "Hey, who cut the cheese?".  Thanks, everyone!

Thursday, November 3, 2011

Black Bean Dip

I hope everyone had a safe and happy Halloween!  To the handful of people who read this blog, I'm sorry I've been slacking when it comes to updating it lately.  We've had a whole new crop of Maeby-related issues this past week or so that have made it a little difficult to concentrate on anything but her.  


But anyway, this is one of the dips I served at our Halloween party over the weekend.  It is another Weight Watchers recipe; the original can be found here.  I made a few substitutions and additions.  You may recall seeing another WW dip recipe that I posted a few months ago.  It, also, is delicious.


You'll need: 


2 15.5 oz. cans black beans, drained and rinsed
1 10 oz. can tomatoes with green chilies, drained, reserving 1/4 cup for garnish
3/4 cup low-fat sour cream
1/4 tsp Kosher salt
2 limes, juiced
garlic powder, to taste


In a blender or food processor, combine the ingredients (except for the reserved tomatoes) and puree to your desired consistency.


Refrigerate until you're ready to serve it.


When serving, garnish with remaining tomatoes and chilies.  Serve with tortilla chips, fresh vegetables, pita wedges, or whatever else your little heart desires.  The original recipe says you can serve it warm or chilled... I've never tried serving it warm.  So if anyone tries that out, let me know what your results are, please!


So there you go!  A nice, simple, and delicious dip.  It does have a purple-ish hue, but not quite as much as the picture above would lead you to believe.  You could also probably kick up the spiciness of this dip by using the tomatoes w/ green chilies that are hot.  Since I'm not really a fan of heat, I just used the mild ones.  Either way, I'm sure it would be really good.  It just depends on your tastes.  Enjoy!